Images are incredibly important for helping engagement, adding interest and breaking up what otherwise would be a wall of text.
Images do bring challenges though. They are often large files that can slow down your page load speed.
As Google and most web users prefer faster load times, this is something we absolutely have to avoid.
So how can you include images on your WordPress website without slowing it down?
By optimizing your images.
We’re going to outline what image optimization is, how it works and how you can optimize the images on your WordPress website with or without a plugin.
What Is Image Optimization?
Image optimization is all about reducing the size of image files while balancing any loss of quality. The ideal is to feature high quality images on your website without slowing pages down with large files.
Everyone should pay special attention to image optimization because it’s one of the most common ways to increase the speed of a website.
What’s nice about image optimization is that it doesn’t require any development skills, so it’s easy to achieve by any website owner.
You can either keep track of every image you upload on your site and make sure to adjust and resize it manually, or you can use a plugin that will optimize all the images for you.
Benefits of Optimizing Images
Image optimization is all about reducing the size of image files while balancing any loss of quality. The ideal is to feature high quality images on your website without slowing pages down with large files.
Everyone should pay special attention to image optimization because it’s one of the most common ways to increase the speed of a website.
What’s nice about image optimization is that it doesn’t require any development skills, so it’s easy to achieve by any website owner.
Optimizing images has a few key benefits. It improves page load times, enhances the user experience and can improve your website SEO.
Improves Page Load Times
As we mentioned at the top, most users will favor websites that load fast. That’s especially true for the increasing number of people who use phones to surf the web.
We are all busy people that have a lot going on and have little tolerance for slow web pages.
According to Unbounce, pages that load faster than two seconds have an average bounce rate of 9%, while the pages that take five seconds to load have a bounce rate of 38%. That translates into less user engagement and fewer conversion rates.
Enhance the User Experience
Faster load times ensures users can access pages quickly and immediately engage.
Keep them waiting and you risk negative feelings or losing that visitor altogether if they get bored waiting and go elsewhere.
If your pages are designed to convert, collect leads or sell, every lost visitor is lost revenue!
Improve Website SEO
Image optimization also improves your SEO ranking. How so? It’s a Google thing. Starting in 2010, Google officially announced that the page speed will play a major role in the ranking algorithm.
So, if you have a slow website, your chances of seeing your site at the top in the SERPs decrease.
Even 12 years later, that same speed ranking measure is still vitally important to how Google ranks your website.
The faster your pages, the better you’ll rank. The slower your pages, the lower you’ll rank.-
Image optimization can be done either manually or with a tool that will handle all the hard work for you on automatic mode.
Further on, we will discuss how you can optimize WordPress images automatically and avoid the extra work of doing it yourself.
Types of Image Optimization
There are three main ways you can optimize an image for best performance, change the file format, compress the image file and change the image dimensions.
Change Image File Format
Images tend to come in three main formats, PNG, JPEG or GIF. Each will work on web pages but are ideally suited to specific types of image.
PNG – .png filers are ideal for high quality images but are larger files. The PNG format is best used for lower resolution images such as banners, infographics or screenshots.
JPEG – .jpg or .jpeg files are very common online as they can be effectively compressed, making them much smaller than they might otherwise be. JPEGs are useful for website, blog and product images.
GIF – .gif files are another common file format found online. They are most often used for simple images or animations as they are constrained by the 8-bit format which limits color and detail. GIFs are useful for added images within content and for basic illustrations or graphics.
Image Compression
Image compression uses an algorithm to reduce image file size. Depending on whether the image file format is lossy or lossless, the algorithm will remove unnecessary data from the image file.
Lossy compression will reduce image quality by removing data while significantly reducing file size.
Lossless compression compresses the image data rather than removing data from the file.
PNG and JPEG files can be lossy or lossless depending on the source image while GIF uses lossless compression.
Changing Image Dimensions
Changing the image dimension is the final method for image optimization.
The larger the image, the more data it contains, so the larger the file. Reducing image size to that required on the page reduces that file size as much as possible.
We recommend sizing your images to the desired dimensions using an image editor before uploading to WordPress. You can also optimize and compress images before, or after uploading.
How to optimize WordPress images
In this guide, we will learn how to optimize WordPress images through two methods.
- How to optimize WordPress images manually
- How to optimize images using a WordPress plugin
Let’s dive in.
How to optimize images for Web Performance
So now you know a little more about image optimization and what it’s all about, let’s get down to it.
Let’s cover manual image optimization, using Photoshop and using an online tool.
Optimize Images Manually
If you’re a fan of doing it yourself, you can manually optimize all images you use on your WordPress website.
You can resize and crop the images by yourself before uploading them. It’s important to first find out the maximum display size of your images so that you won’t exceed the size limit.
The maximum display size is actually the largest resolution an image can be displayed on a website.
Depending on who you ask, this will be around 1200 x 628 pixels for header images and between 640 x 480 and 1024 x 768 for standard images.
Optimizing Images with Photoshop
As Photoshop is one of the most popular image editors, let’s manually optimize an image using it.
- Open Photoshop and select File > Open
- Select your image so it loads in Photoshop
- Select Image > Image Size from the top menu
- Set the desired height and width for the image
- Set the Resolution in the same menu
- Select File > Export > Save For Web
- Select JPEG from the menu
- Set an image quality value of between 40 and 60 (may need experimentation)
- Set Progressive and Embed Color Profile to Yes
- Convert to sRGB and save the file
Optimizing Images with Online Tools
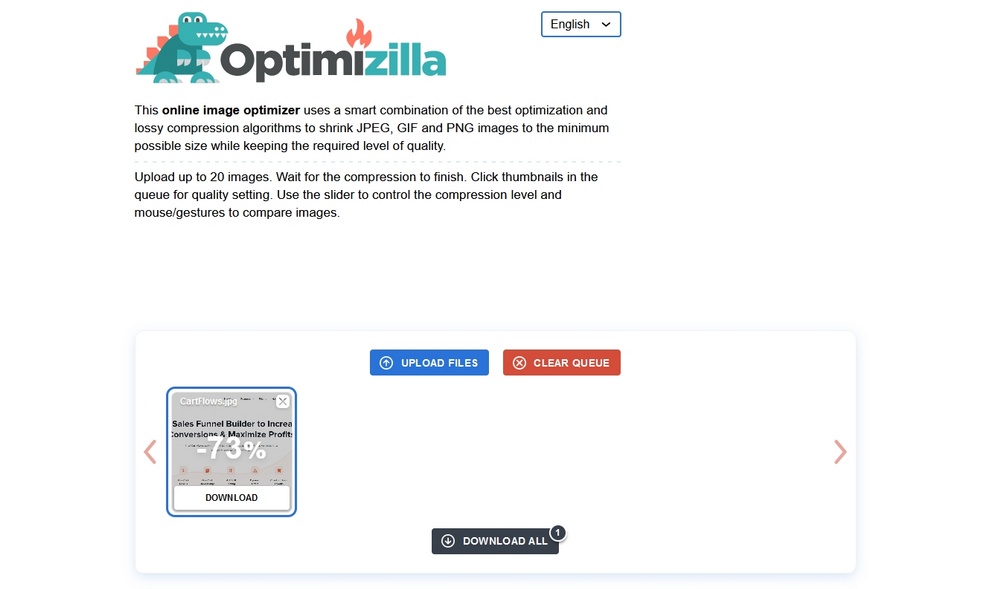
There are a number of online tools that can perform image optimization. They tend to be quick and painless to use and are a viable alternative if you don’t have an image editor.
One online tool is Optimizilla.
- Visit the Optimizilla website
- Drag your image into the box in the center and optimization will happen automatically
- Select Download within the image to download the optimized image
You’ll see a percentage within the image when optimized. This is the percentage the file size was reduced. The higher the percentage, the smaller the file.
Use a WordPress Plugin to Optimize Images
If you don’t want to optimize images manually, you can install a plugin that will do all of the above (and more) for you.
There are lots of image optimization plugins out there, but we like Optimole. We’ll use that for our example.
Other image optimization plugins will achieve much the same thing but in slightly different ways.
Installing the Optimole Image Optimization Plugin
Installing Optimole is easy. You will need to register it with an email to activate it, but otherwise, it’s very easy to use.
There’s a free version too, which we use in this example.
- Log into your WordPress website
- Select Plugins and Add New from the side menu
- Search for ‘optimole’ using the search box at the top right
- Select Install and Activate when the options appear
You will be prompted to sign up for an API key, which you’ll need to do to be able to use it.
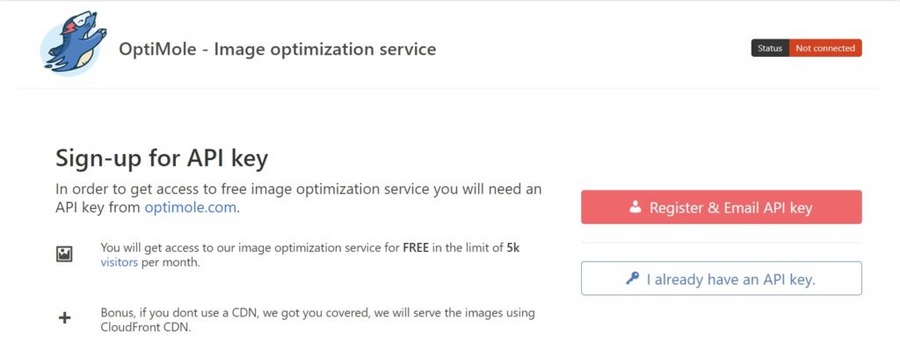
- Select the Register & Email API Key option in the first Optimole window
- Paste the API key you receive via email into the box and confirm
- If the window doesn’t appear, select Media > Optimole to bring it up
You’ll see a connection screen that syncs your plugin with the Optimole servers. Once done, you should now be able to use the free features of Optimole to optimize your images.
Optimizing Images with Optimole
Now Optimole is up and running, let’s optimize an image.
The good news is, Optimole will automatically optimize any new image you upload. You don’t need to do anything as the plugin will automatically scan and optimize in the background.
Optimole will also optimize all existing images already uploaded to WordPress. It won’t do this automatically. Instead, it will optimize the images when the page or post is first visited.
This way, you don’t overload the plugin all at once and images can be optimized more efficiently.
It transfers your original images to the cloud and replaces their initial link with a custom one after they’re being optimized. The optimized images are rendered through a CDN that delivers them faster.
When you visit a page with an image, you will notice that the image will display the custom Optimole URL (right click > Open image in new tab).
The automatic settings are pretty good but you can change them within the Settings menu accessed via Media > Optimole > Settings tab.
The Settings tab allows you to configure the plugin options. Free users won’t be able to do much here, but if you’re a premium user, you’ll have lots of options access by the General and Advanced links on the left of the window.
Benefits of Image Optimization Plugins
The benefits of image optimization plugins are many, but they are mainly useful for shrinking image files sizes to improve page load speeds.
You can do this manually, as we outlined above, but you can also use a plugin to do the heavy lifting for you. Why manually change every image when a plugin can do it for you automatically?
Another benefit of some plugins is the use of CDN. Optimole isn’t the only image optimization to use CDN, others offer similar features.
Rather than your web server sending all pages and media, the Content Delivery Network hosts copies of your website at locations across the world. Intelligent routing means the CDN closest to the visitor will send the data, reducing wait times and improving the customer experience.
Image Optimization Tests – Before and After

Now, let’s do some tests to see how efficient automatic image optimization is.
WordPress, by default, scales down high-resolution images but let’s see how you can reduce them even more with an image optimization plugin.
So let’s do a before-and-after experiment, using the same image.
Results Before Image Optimization
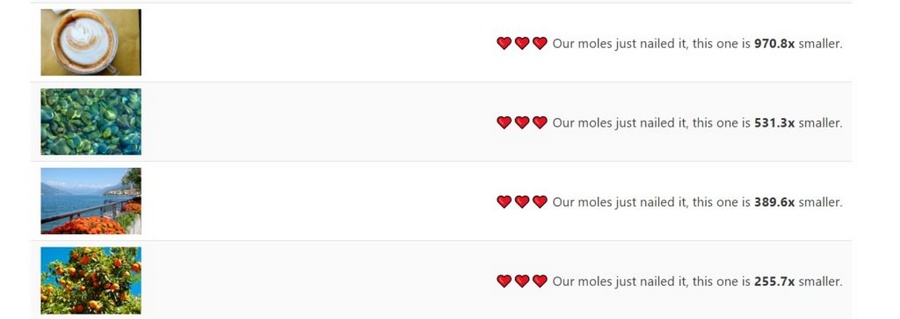
Using a testing WordPress instance and Twenty Twenty default theme, we uploaded a few photos of different sizes borrowed from MyStock.photos. We included the images in a regular blog post, via a gallery block.

Now, if you click on each image to enlarge it, you will notice that WordPress resized them by default. So the four images that we uploaded were reduced as follows:
7.47 MB > 676 KB
12.3 MB > 762 KB
11.2 MB > 384 KB
8 MB > 794 KB
If you upload the first image to a regular post type, without the option to enlarge it, its display size will change from 7.47 MB to 452 KB.

WordPress, by default, reduced the image uploaded in a single post from 7.47 MB to 452 KB.
If you access the same blog post from your mobile, the image will be reduced to 92.61 KB.
So these are the changes that WordPress is doing by default when you access your blog posts via desktop and mobile.
Results After Optimole Image Optimization
Now, let’s see how Optimole compresses your images. Just like we did in the first part of the testing (without Optimole), we created a gallery block by uploading the same unoptimized pictures taken from MyStock.photos.
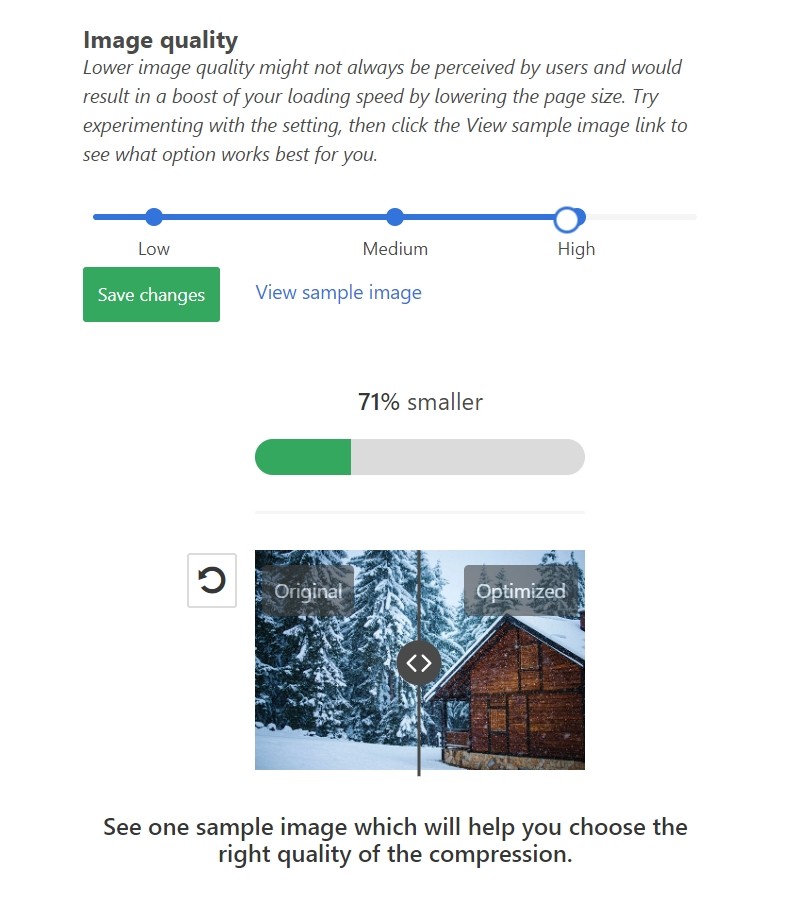
Optimole has four compression levels. If you go with High, the compression will keep the image quality as high as possible.
If you go with Low, the compression and optimization will be more drastic (it will reduce the size to a much larger extent).
Once you visit the post on the live website, Optimole immediately takes over and creates a compressed alternative of every image you click on (each image can be enlarged).
With high-quality compression, the images were reduced as follows (these are the same images listed in the same order as in the previous test):
7.47 MB > 557 KB
12.3 MB >548 KB
11.2 MB > 220 KB
8 MB > 547 KB
With low-quality compression, the results are different:
7.47 MB > 251 KB
12.3 MB > 269 KB
11.2 MB > 124 KB
8 MB > 302 KB
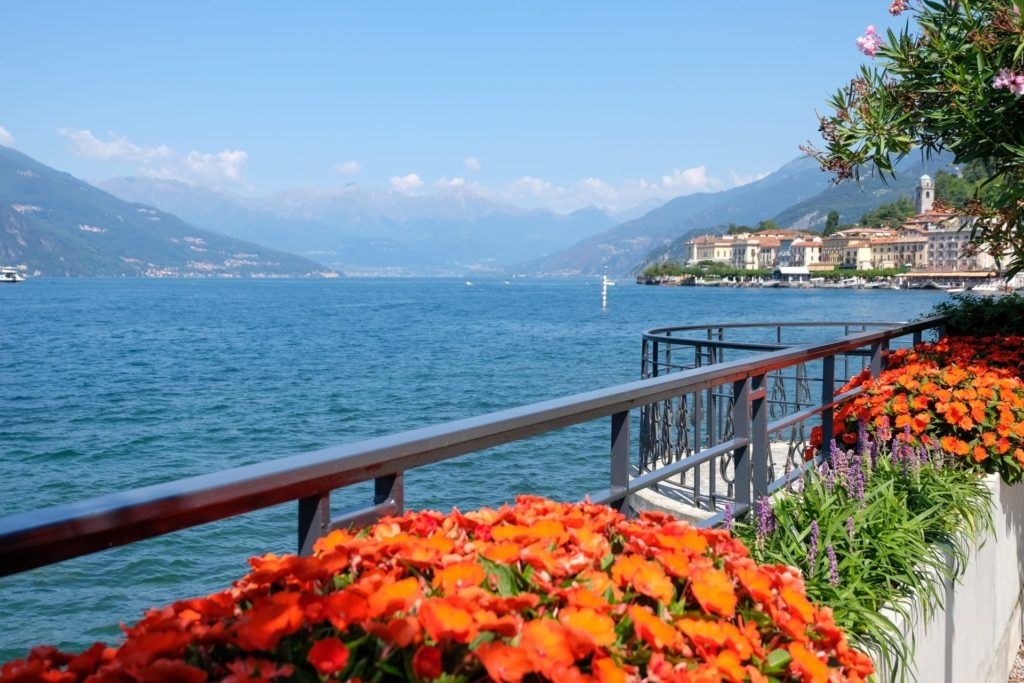
This is how the first image in the list looks after both High and Low compression levels (the level of quality) :
High-quality level (557 KB)
Low-quality level (251 KB)
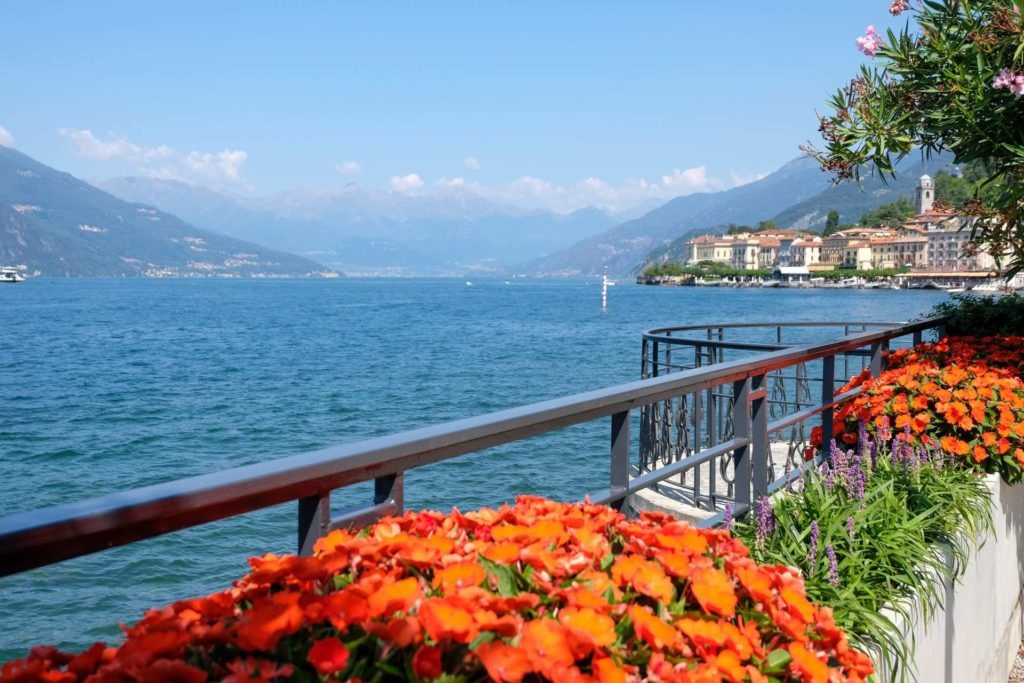
With the naked eye, you can notice that the quality of the image didn’t change much.
Now, if you add an image to a blog post without the option to enlarge it, it will be automatically reduced to its maximum display size (the maximum display size that is required for a blog post).
For example, this image alone was converted from 7.47 MB to 75.3 KB (in high-quality compression) while being displayed in a single blog post:

Single post image compressed to 75.3 KB
580 x 387 pixels
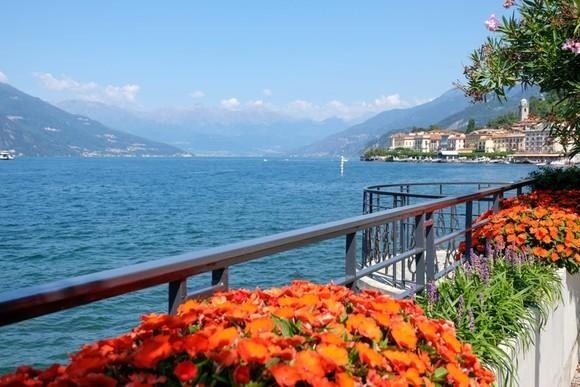
This is nice because your server won’t need to load the full size of the picture when a smaller size is preferred.
But that’s happening on the desktop. For mobile screens, Optimole will create alternative versions of the image, even smaller than their desktop counterpart.
So, if someone is accessing your site from mobile, Optimole won’t deliver the desktop version of the image which, even optimized, can still take time to load on a smaller device. The plugin actually delivers a separate mobile alternative to that image.
The same image in the blog post from above was reduced to 20.15 KB for mobile users (from 7.47 MB in original).

Optimole uses both lossless and lossy compression methods, which are set based on what compression level you choose.
Through lossless optimization, the images won’t lose significant data during compression. They will look just like their original version after the optimization. That’s why lossless optimization won’t reduce disk space very much, the differences in size after compression is almost zero.
On the other hand, there’s lossy optimization, which actually reduces your images’ size to a high extent, but without reducing quality (as perceived with the naked eye).
So if you are looking to make your database significantly lighter than it is now, you can go with lossy optimization because your visitors won’t notice the conversion.
Other Ways to Optimize Images
Apart from resizing, there are still a few other methods to serve lighter images to your visitors and improve your site’s loading times.
Lazy loading
Lazy loading is another method that will contribute to keeping your images from slowing down your site. If you have image-heavy posts or pages, displaying them all at once might not be a good idea.
The lazy loading feature will display them gradually when the user scrolls down the page. With every scroll, a new batch of images is displayed onto the visible area of the user’s screen, so this way the server will respond better to all the requests.
SVGs and Vector Images
SVGs are Scalable Vector Graphics, or vector images. Where PNGs and JPEGs are raster-based, SVGs are based purely on math. That means they can be infinitely scaled up or down while retaining smaller file sizes.
SVGs are ideal because the same image can be rendered on different screen sizes without losing detail or becoming distorted. They also require fewer HTTP requests to load and can be understood by search engines, which offers a small SEO benefit.
Use Content Delivery Network (CDN)
A CDN is a service that serves your website using the server nearest to your visitors, which translates into faster loading times. Optimole comes with an integrated CDN service for images, which works automatically.
Cloudflare and StackPath are independent WordPress plugins that provide CDN services for your entire database in case you need a full-site optimization.
Convert GIFs to Video
To save disk space and display lighter files, you can also convert GIFs to video. If you activate this feature in Optimole, it will automatically start to convert every GIF file you upload.
The video formats available are MP4 and WebM, and the plugin will choose the more efficient one for each particular case during the conversion.
There are also several online tools that you can use to convert a GIF to MP4 before uploading it to your WordPress site. Why convert? Because GIF formats are larger than video formats.
Smart cropping
Smart cropping means cutting out unnecessary space or background of an image and only keeping the point of interest.
Cropping can be done either manually or by using a plugin like Optimole that will automatically detect the ‘hot spots’ in an image and remove the unneeded parts.
Wrapping Up
Image optimization is a simple technique that doesn’t require much effort if you use a plugin and only modest effort if you perform it manually.
As long as you optimize all your images, it doesn’t really matter how you do it. Just that you do it.
Large files slow down web pages and that’s something nobody wants. Google will penalize you for slow pages and users will too.
There is simply too much competition on the web to let any potential advantage pass you by. When image optimization is so effective, yet so simple to implement, you really should consider it!

Pratik Chaskar holds the pivotal role of CTO at Brainstorm Force, serving as the backbone of the company. Renowned for his organizational skills, strategic thinking, problem-solving attitude, and expertise in leading and executing plans, Pratik plays a crucial role in the BSF’s technological landscape.
Disclosure: This blog may contain affiliate links. If you make a purchase through one of these links, we may receive a small commission. Read disclosure. Rest assured that we only recommend products that we have personally used and believe will add value to our readers. Thanks for your support!





How does converting to mp3 save file size?
Thanks for your comment, Julius. You can refer to the article we referenced for the claim.
Does the Astra theme support Imagify?
Hello,
I would like to ask you I have installed the astra theme and I want to resize image automatically when uploading.Which plugin is compatible and suitable for astra theme?
Hello George, we have covered the plugins that would work fine with Astra. Do give them a try and let us know how that goes. 🙂
Hi. You can use a free online tool to reduce image file size.
Yes, sure! 🙂
HI, in woocommerce Astra Pro the images are blurry.
I had the genesis theme with images at 1000×1000 optimized before with no problems, but with Astra all the images of catalogue and single product are blurry.
This problem appears since 2018 and no help or results found in FB group neither Support.
Please give a guide to solve this problem. Thank you.
Thanks for the useful information! I take photos for my site myself, but I’m still not sure that I’m uploading the right images to the site that won’t cause damage. Many write that the size of the compressed image should not be more than 100 kb. What do you think about this?
I preferred your page as it tells exhaustively about
Everything is very open with a precise explanation of the issues. It was really informative. Your website is useful.
I was very much delighted to read your article. Optimizing images in WordPress is crucial for improving website performance and ensuring faster loading times. Here are several steps you can take to optimize images in WordPress:
1.Resize and crop images
2.Compress images
3.Use the correct image format
4.Lazy loading
5.Leverage caching
6.CDN integration
7.Enable responsive images
These are some points which I wanted to include in your article. Readers, If you want to develop your wordpress website, you can visit an IT company like Alakmalak technologies. They have 17+ years of experience in this field.