A site footer with just ‘Powered by WordPress’ is boring.
It can be used for multiple purposes, primarily for navigation and SEO benefits, but most people just leave it as the default.
That’s a shame as it’s capable of so much more!
Want to edit your footer to get the most out of it?
We’re going to show you 5 simple ways to edit your WordPress footer using:
- The WordPress customizer
- The Astra Footer Builder
- Elementor
- Block theme footer editor
- The footer.php file
If you’re one of the many who want to change the copyright date to automatically update in WordPress, we’ll show you that too.
However you like to build and maintain your website, we’ve got you covered!
What Exactly Is WordPress Footer?
If you scroll to the bottom of this, and any other page on the Astra website, you’ll see our footer:
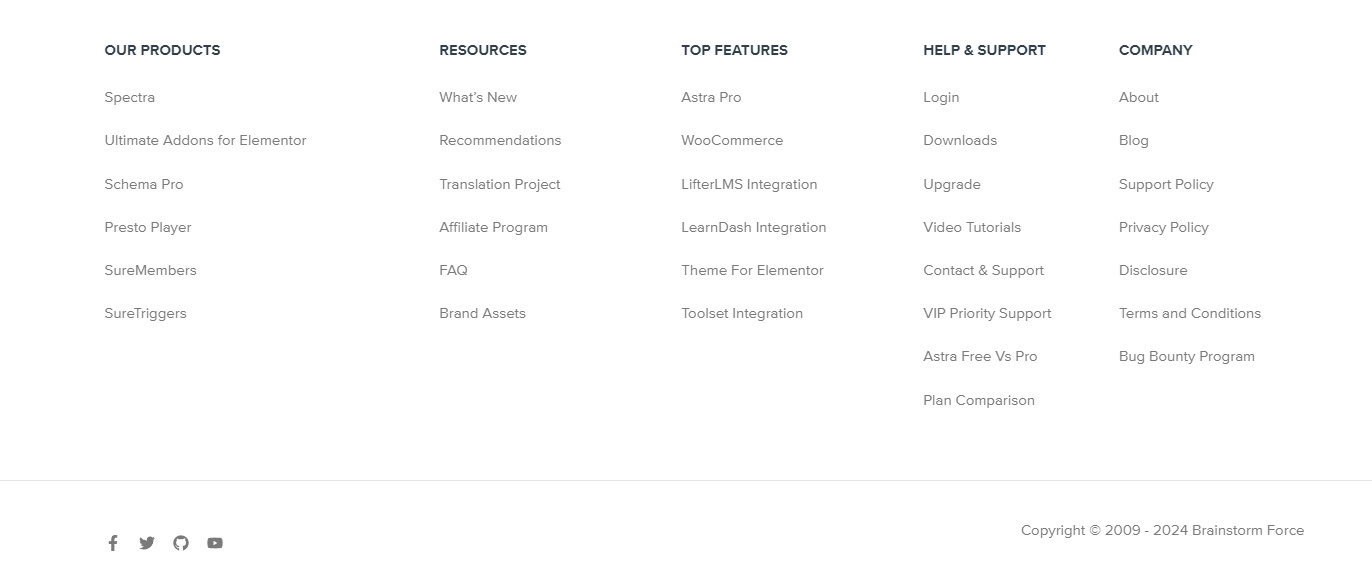
In addition to the copyright statement and social media icons, you’ll notice a series of additional links.
Those are all important pages, but not the primary reason a visitor might be on the site.
Adding them in the footer keeps your main navigation focused on delivering on user intent while still providing convenience.
After all, most of us know that if a link isn’t in the header, it’s likely to be in the footer.
Website Footer Examples to Inspire You
Here are some examples selected from our collection of Starter Templates.
This is a straightforward website footer that includes a ‘Subscribe to Newsletter’ call to action, social media icons and copyright statement.

It’s a simple, no-nonsense footer that could work well for smaller websites.
In this example, the footer includes the address, social media icons and a subscription form.

It’s another simple footer but strongly branded so it fits into the overall design.
Want to promote your business? Want to remind visitors what you offer? The website footer is a great place to remind them!
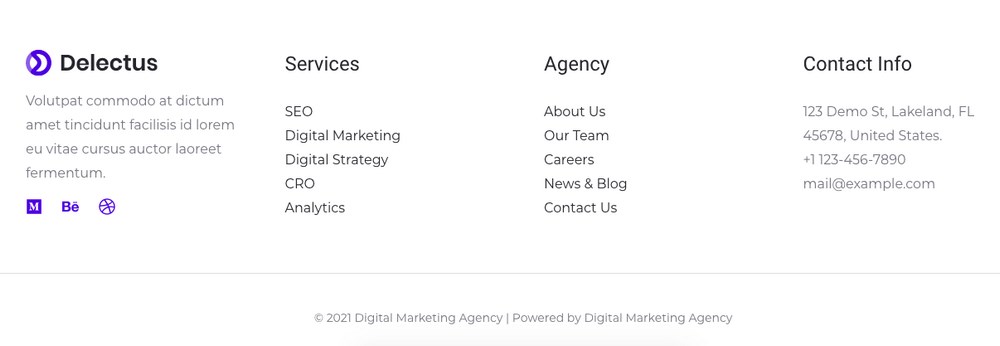
You can remind visitors of your services as well as providing other useful links.
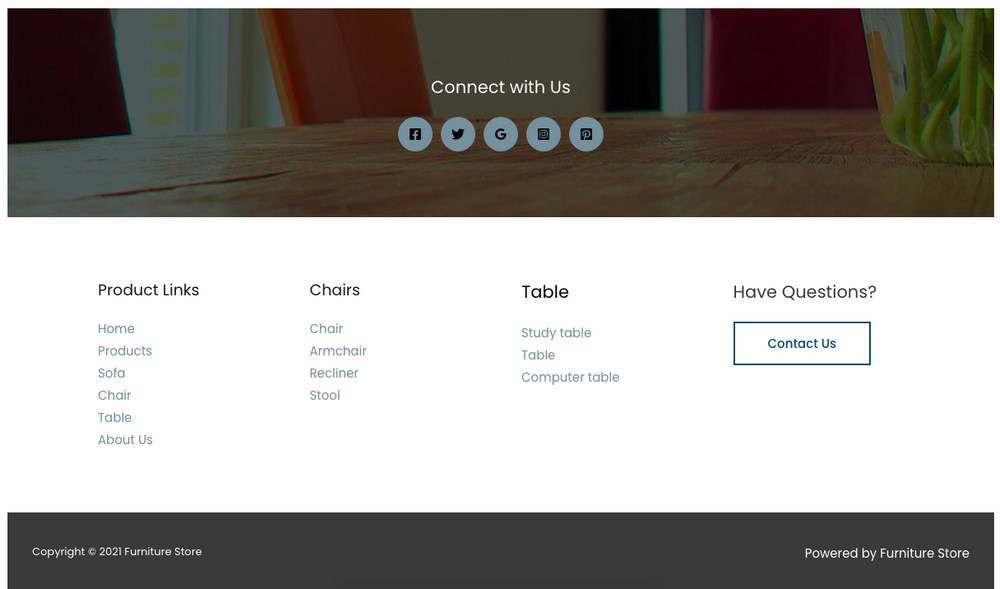
This eCommerce footer includes links to individual product categories. This is another opportunity to promote featured products for one last attempt at conversion.
It covers all the basics and then some!
This example includes all the elements visitors look for, including social media, newsletter signup, extra links, address and copyright.
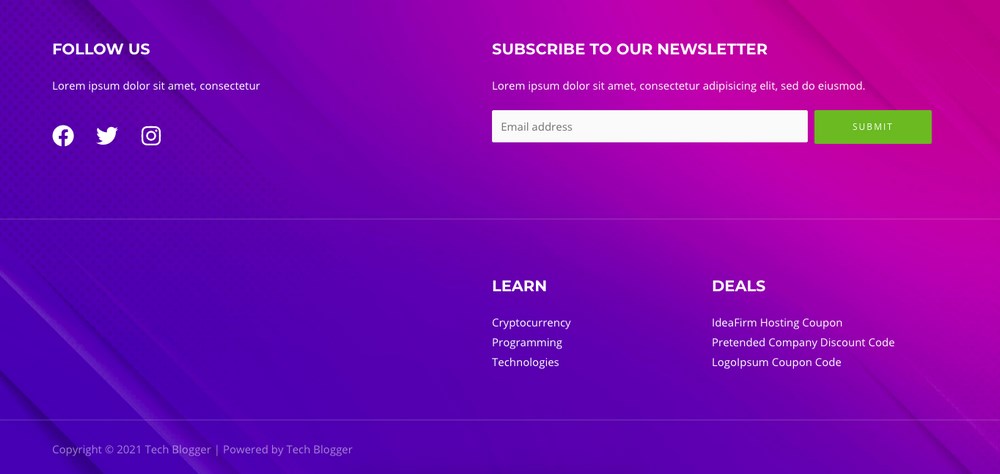
This is another strongly branded WordPress footer that reflects the overall design.
Those are some of the many ways to customize your footer.
Here’s how to go about it!
How To Edit the Footer in WordPress
Editing the footer is very straightforward once you know how.
You would typically edit it to change the design, widgets or their contents, add code to the footer, add a form or something else.
We’re going to show you 5 different ways to do all those things:
- The WordPress customizer
- The Astra Footer Builder
- Elementor
- Block theme footer editor
- The footer.php file
We won’t get into the specifics of what to change but we’ll show you exactly how you would go about making those changes.
Pro Tip: Tweaking your footer on a live site can break layouts. Instead, use ZipWP to spin up a test site instantly. You can experiment with themes, widgets, and custom code risk-free, then apply changes to your real site with confidence.
Try ZipWP for hassle-free testing!
See how building a test website is effortless with ZipWP.
1: Edit the Footer With the WordPress Customizer
Editing the footer using the WordPress customizer makes it easy to personalize your design without needing a page builder.
Log into WordPress and select Appearance > Customize > Footer.
Depending on the theme you have installed, you may see Footer or Footer Builder in the menu. Both will work.
What you see next will depend entirely on the theme you have installed.
You should see something like this:
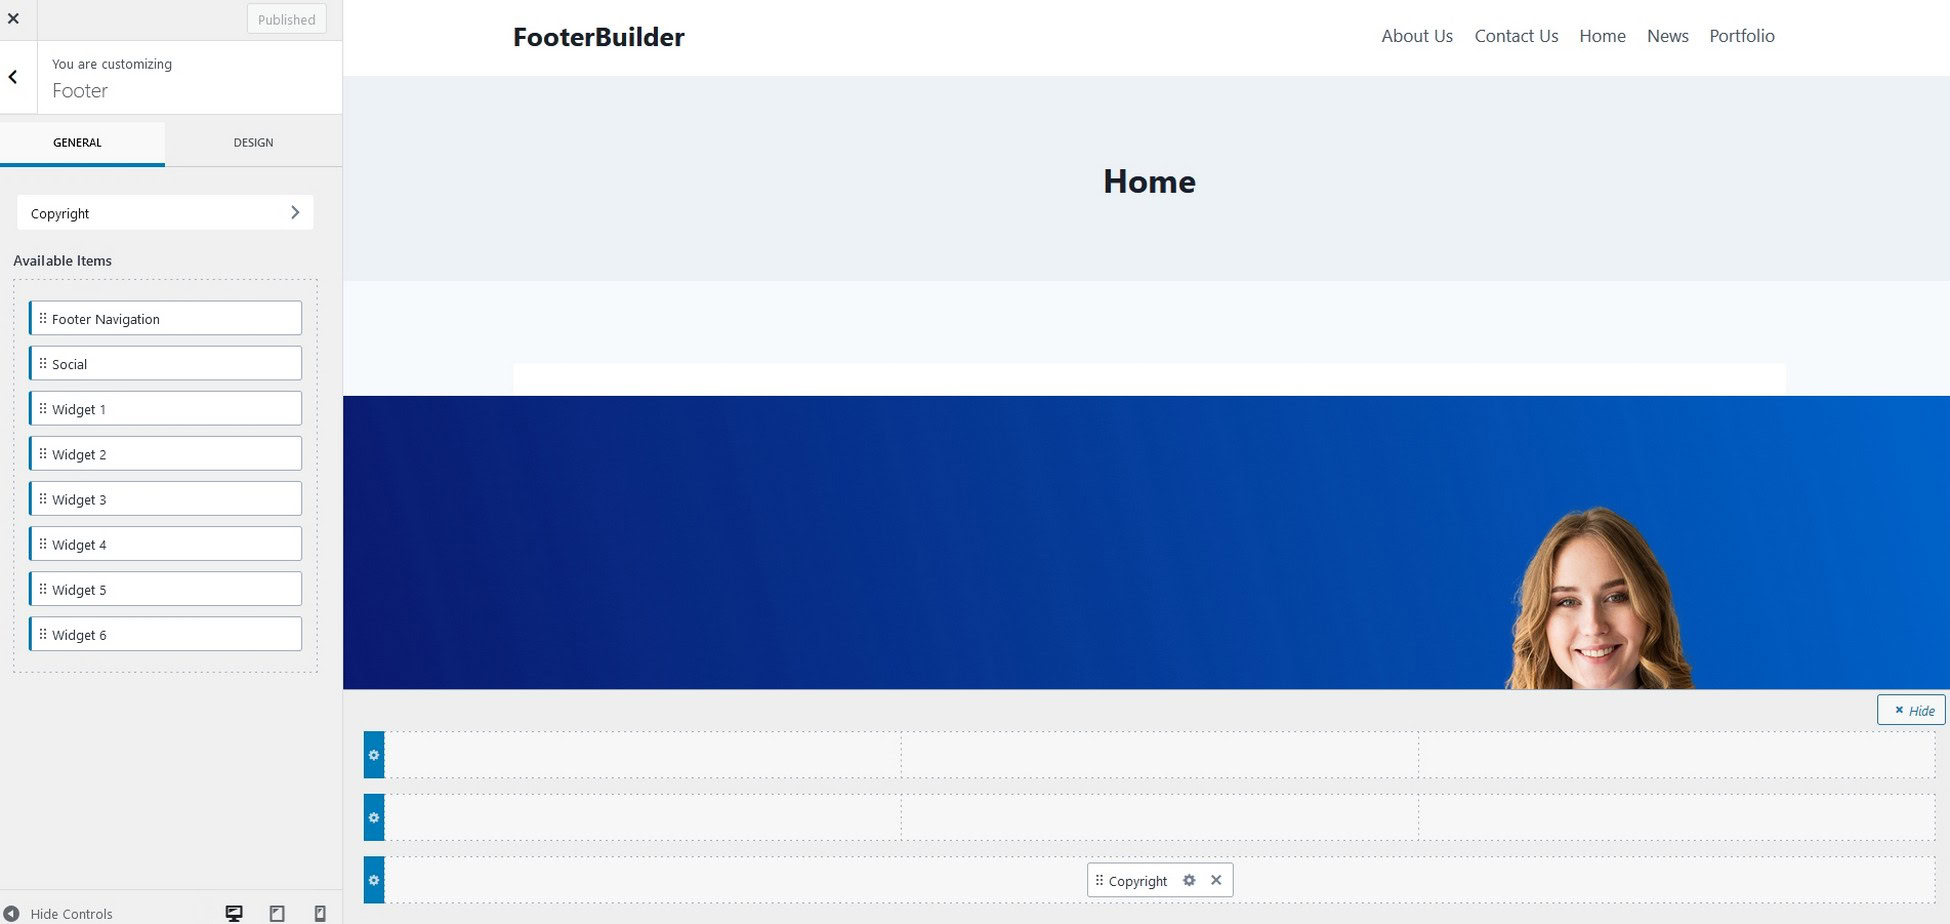
You should see available footer widgets on the left and the footer customizer at the bottom of the center screen.
Drag and drop a widget onto the footer and watch it appear in real time in the center.
Select a widget to access its settings and use the new menu on the left to make your changes.
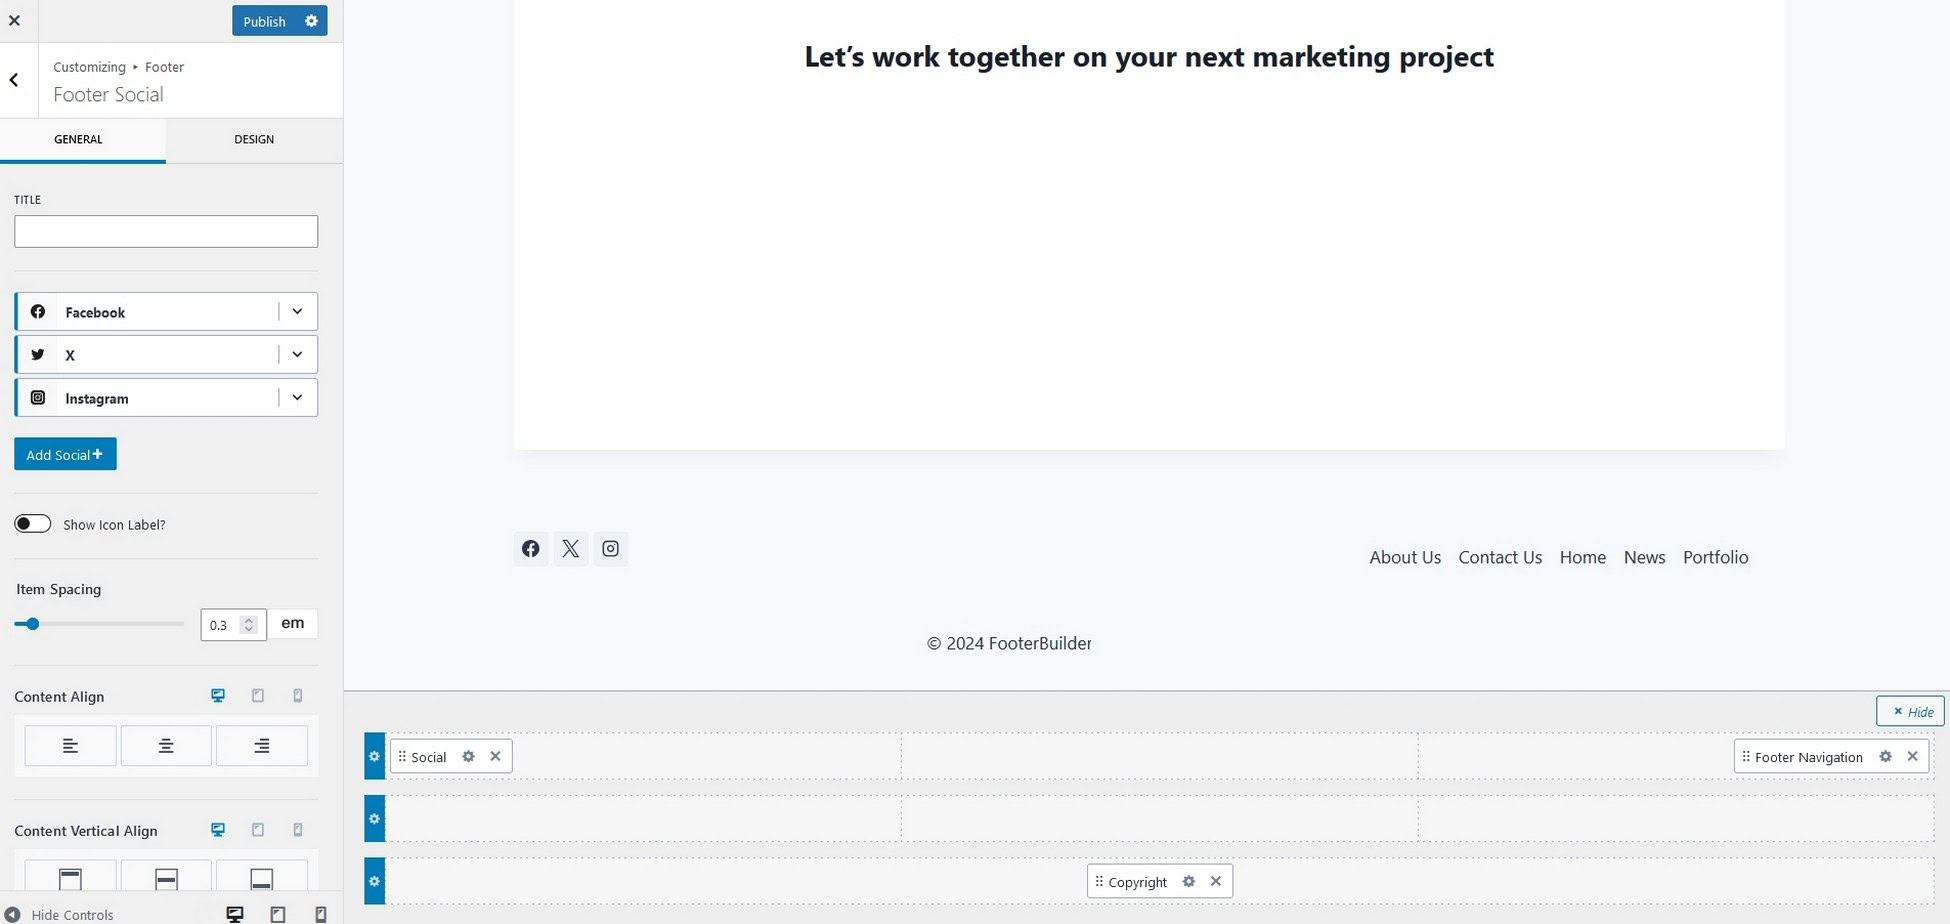
Repeat for every element you add to your footer until you’re completely happy.
Then hit the blue Publish button at the top to save your changes.
If you want to add a form, code or something else, select an empty space at the bottom and add a text or code block.
Type or paste your code, embed or whatever into the block and save your change.
Method 2: Use the Astra Footer Builder
The Astra theme includes a Footer Builder and you should see a menu item in the customizer so you can use it.
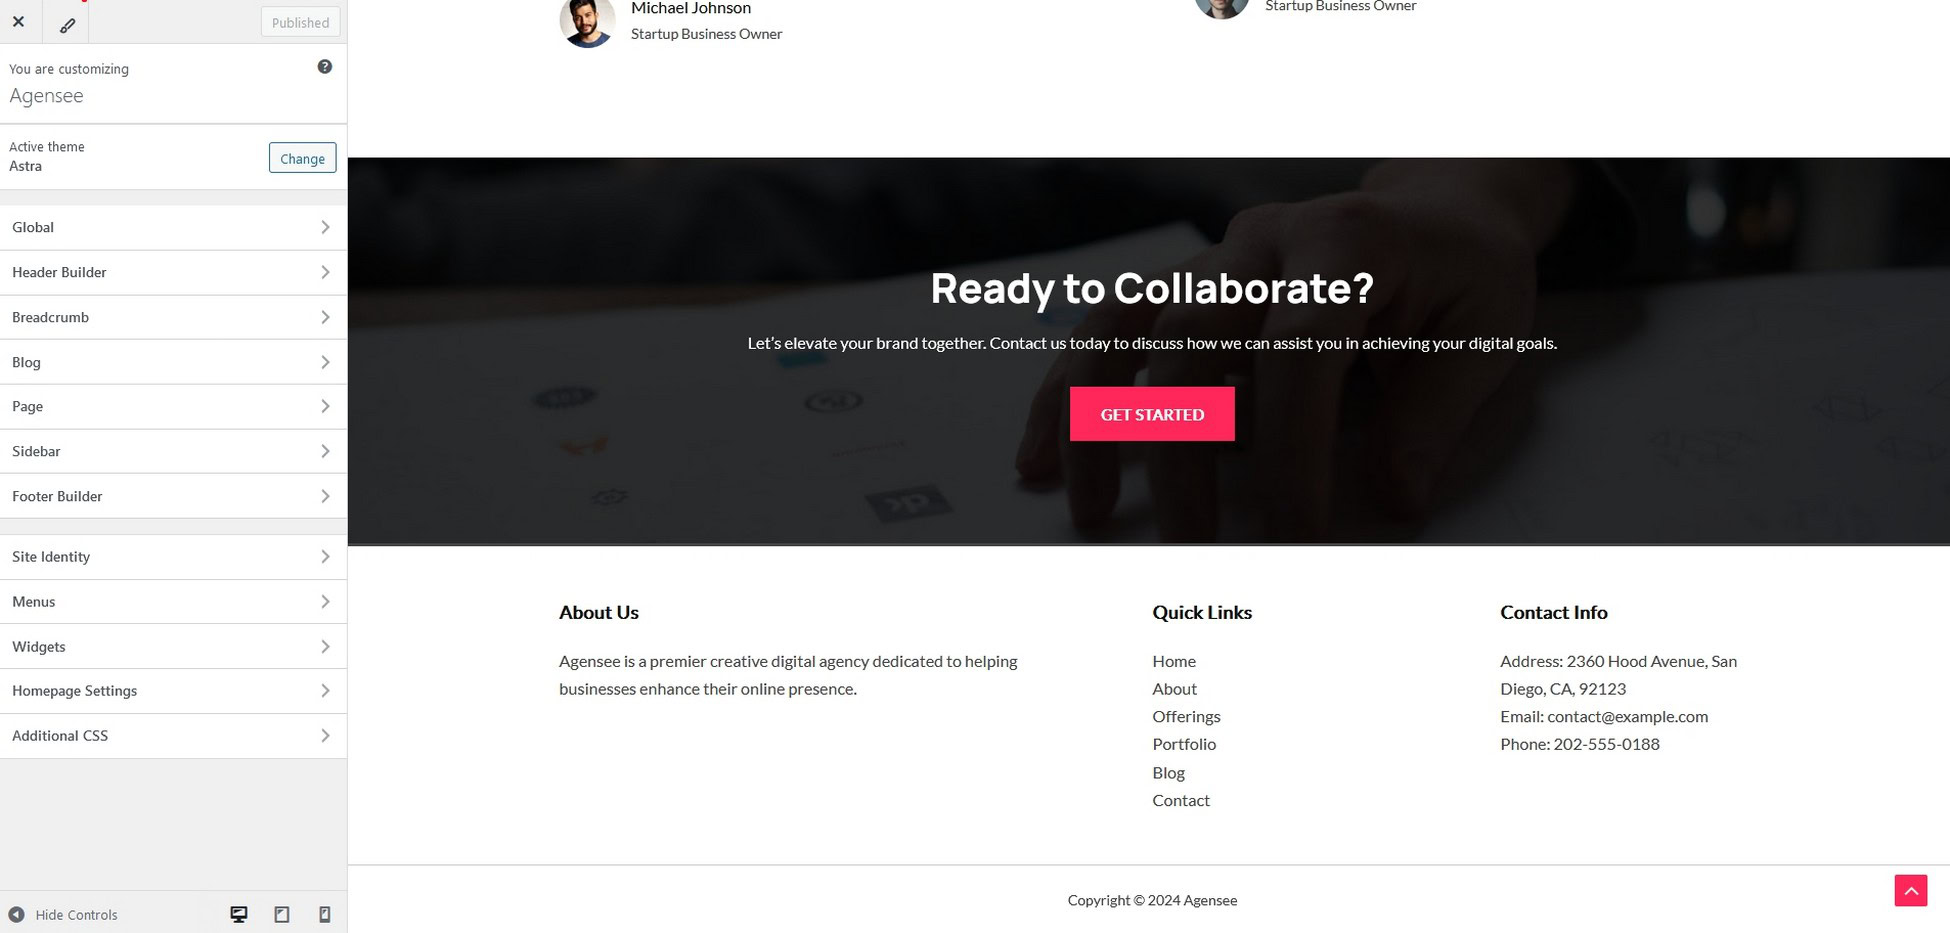
Select it and you’ll see the widget areas of your current theme in the left menu (1) and a drag and drop widget area at the bottom of the center pane (2).
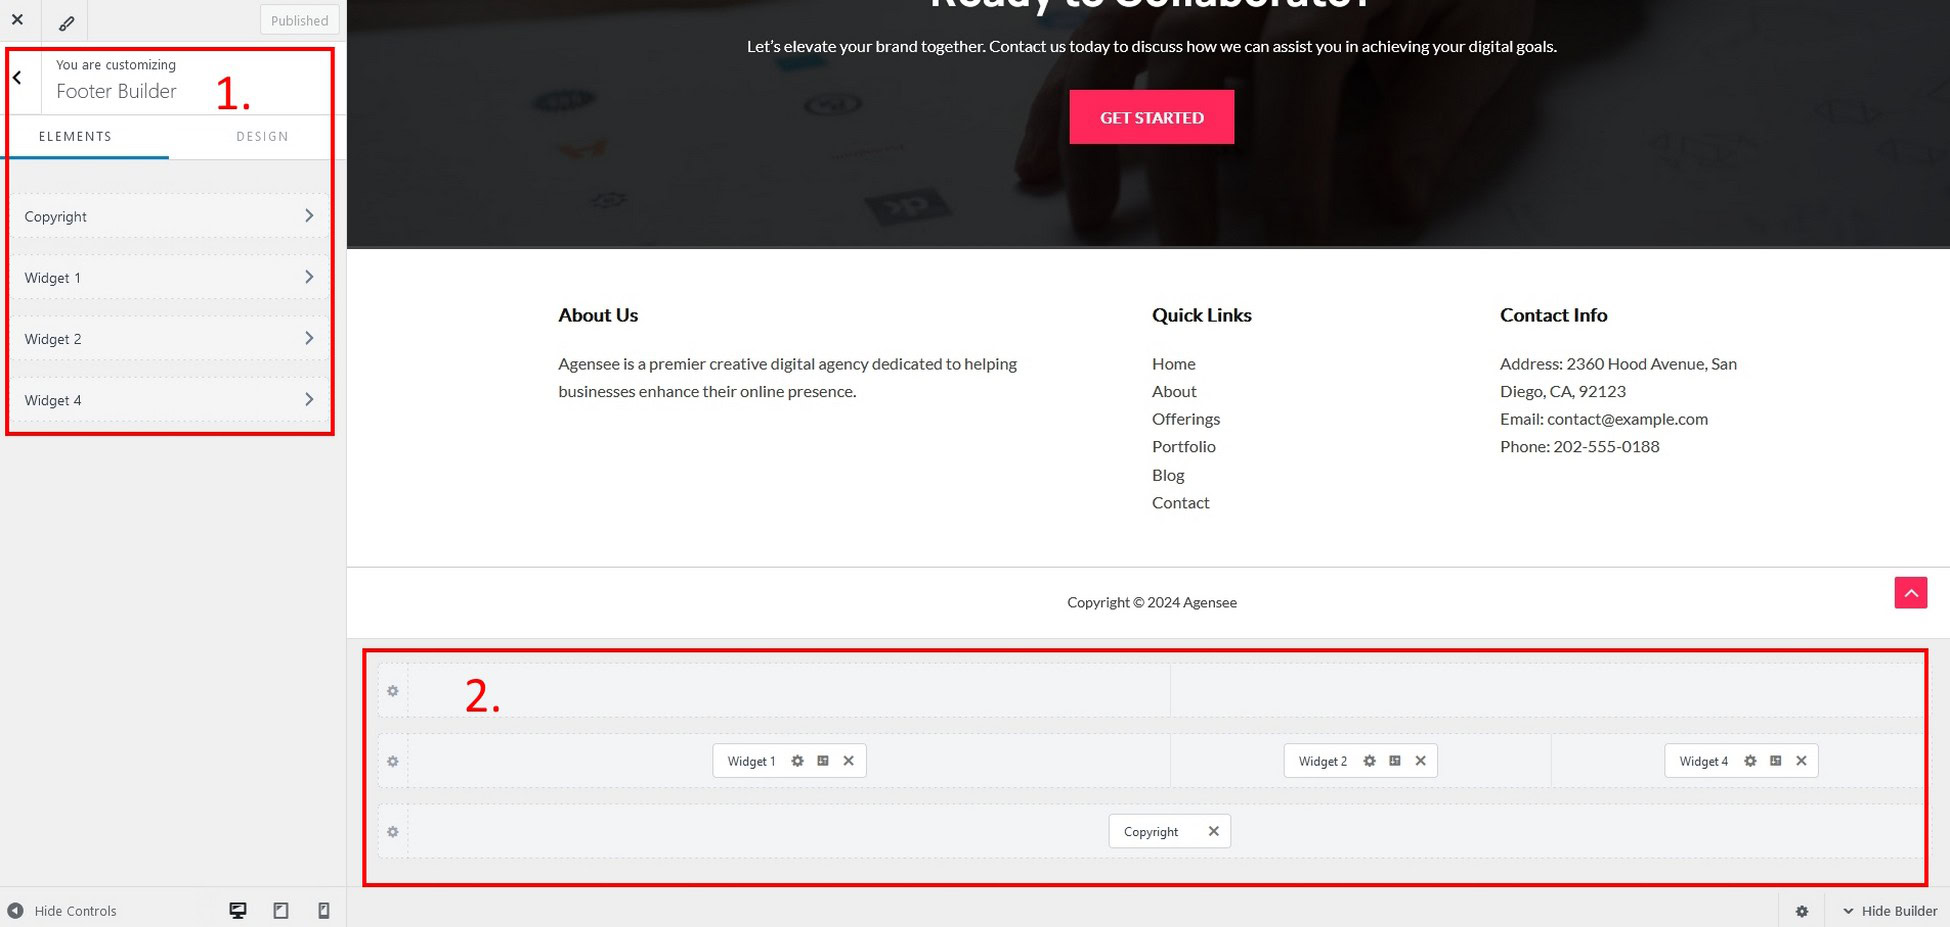
It’s a similar setup to the WordPress customizer but has a few more options.
Select a footer widget at either location and you’ll see the properties menu appear on the left.
Make any changes you like, change the widget, replace the content or whatever.
Rinse and repeat for every widget in your footer.
The same principle applies whether you want to change the design, add custom code, a map, video or something else.
Either modify an existing widget or add a new one in an empty spot.
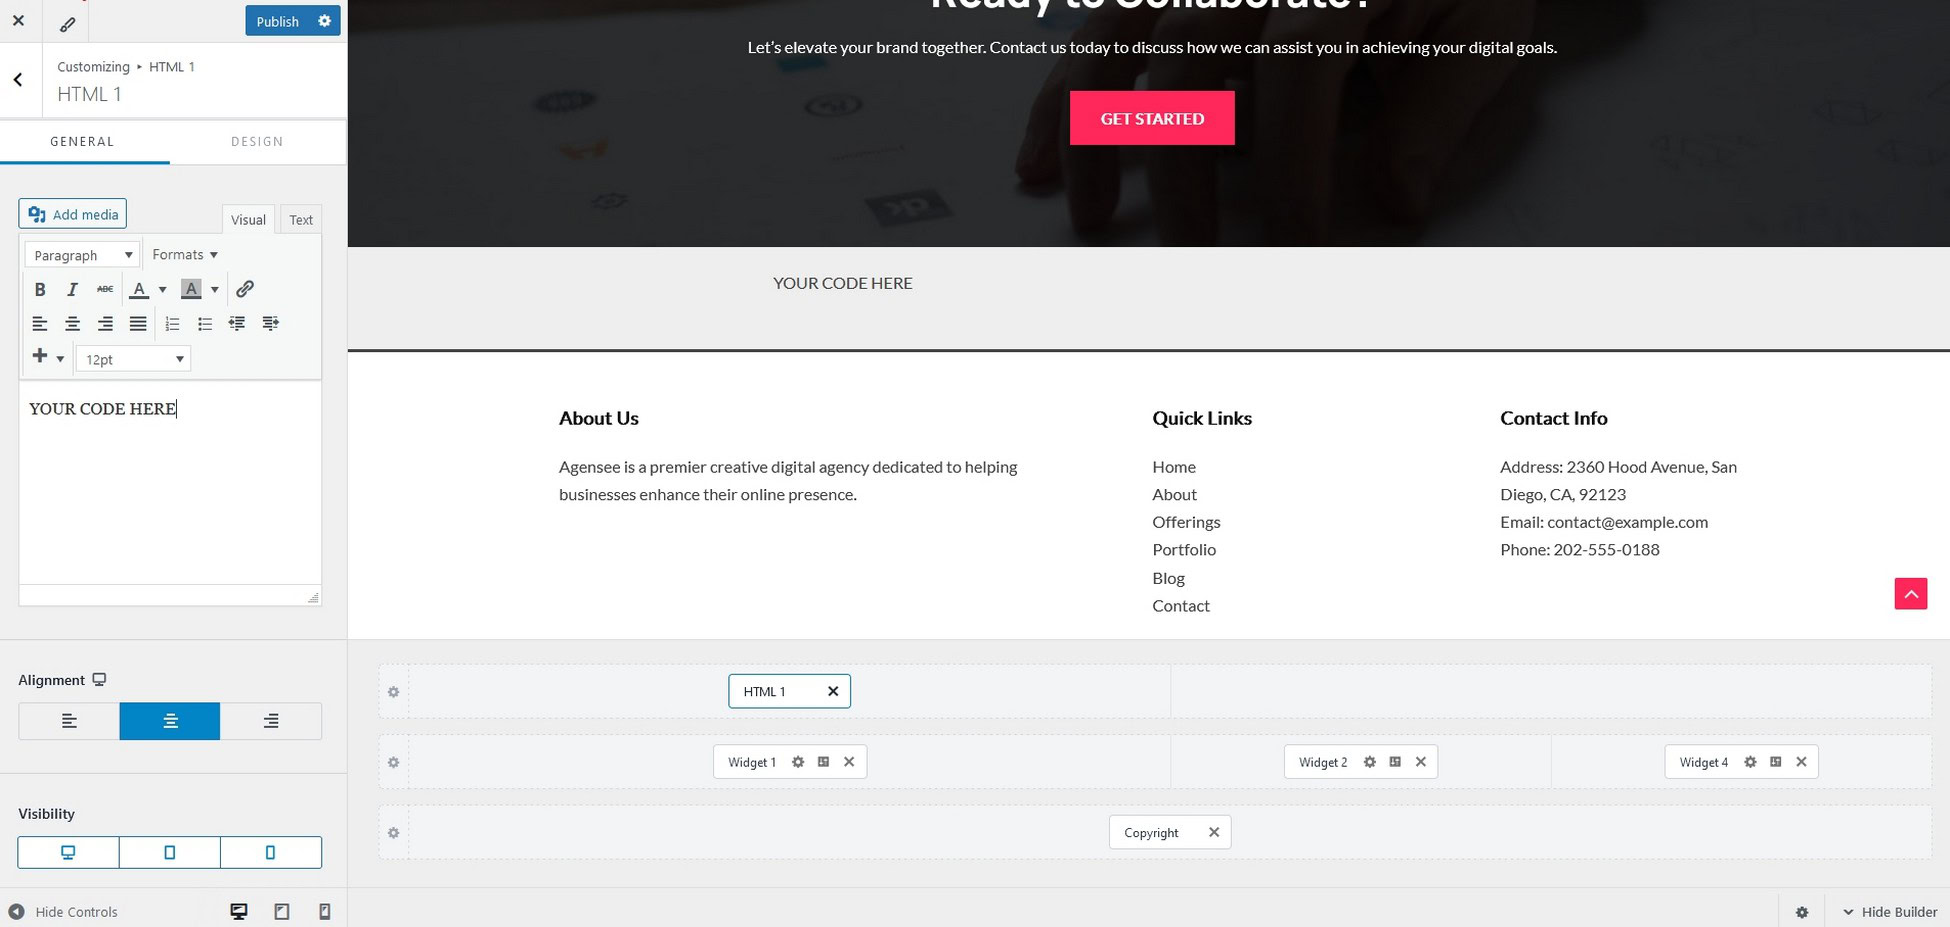
Add your code in the box in the left menu.
Select the blue Publish button when you’re done.
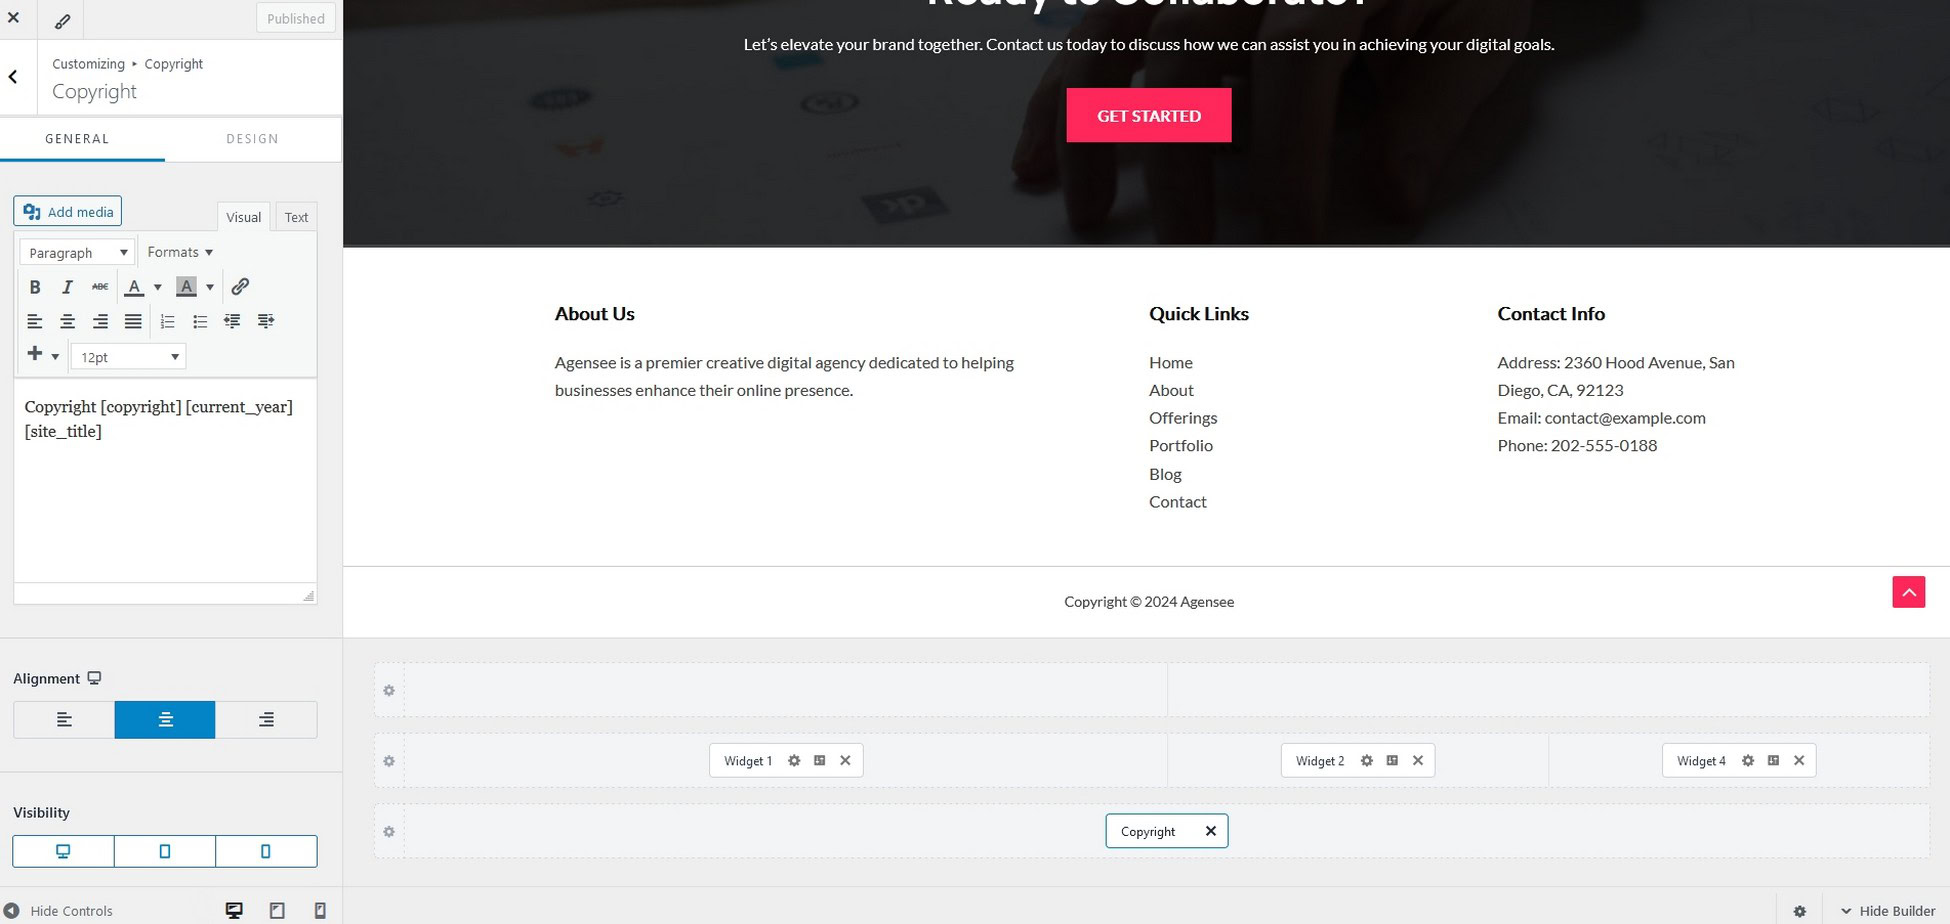
That’s how easy it is to edit the footer when you use the Astra theme!
Method 3: Edit the Footer With Elementor
For this method we’ll assume you have Astra and the Elementor page builder installed.
To begin with, let’s install a plugin.
Head over to ‘Plugins > Add New’ and search for the Elementor Header & Footer Builder plugin.
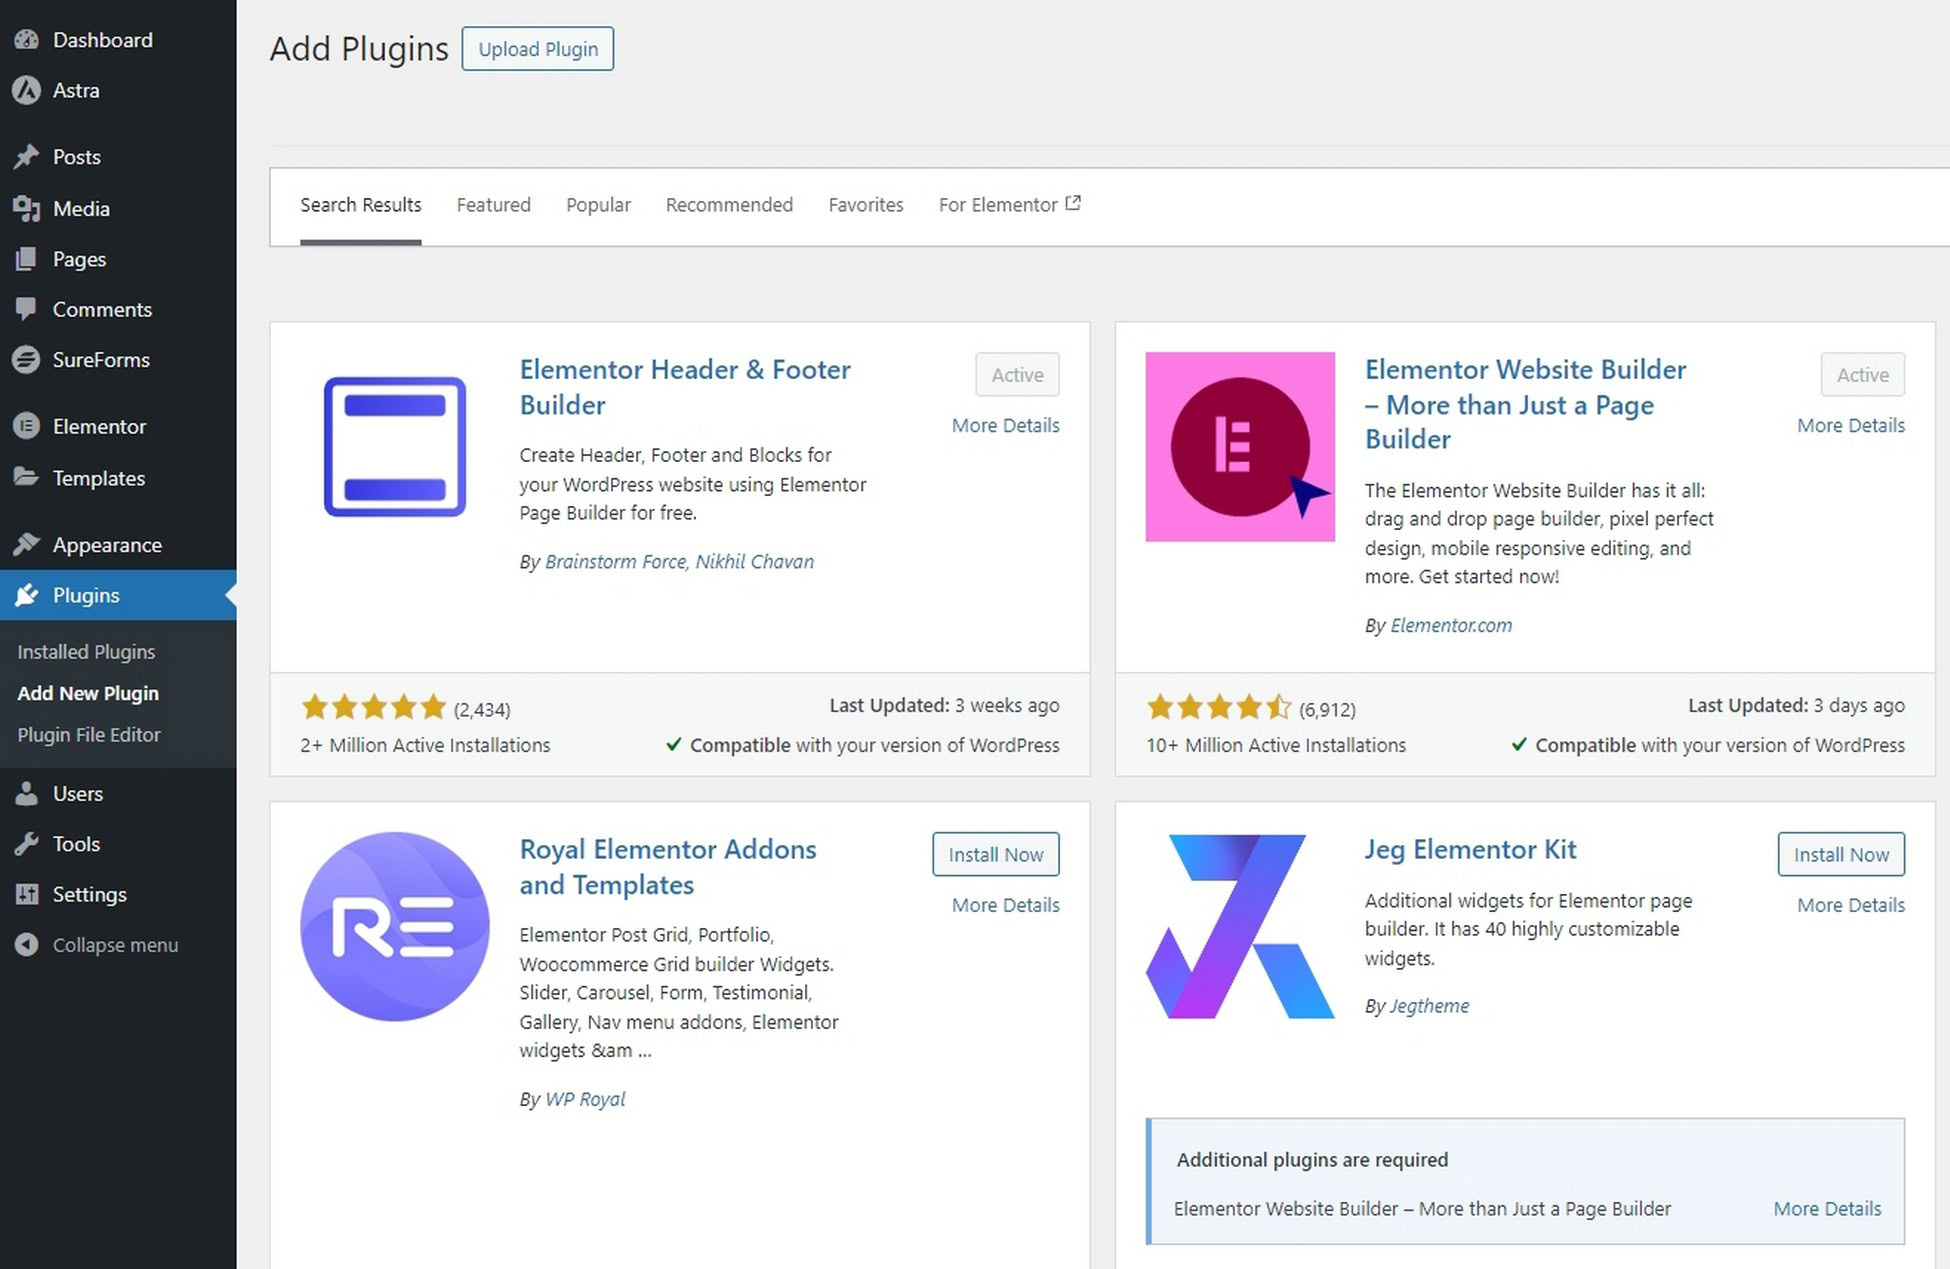
Install and activate the plugin.
Select Appearance > Header Footer & Builder where you’ll find the default Footer template.
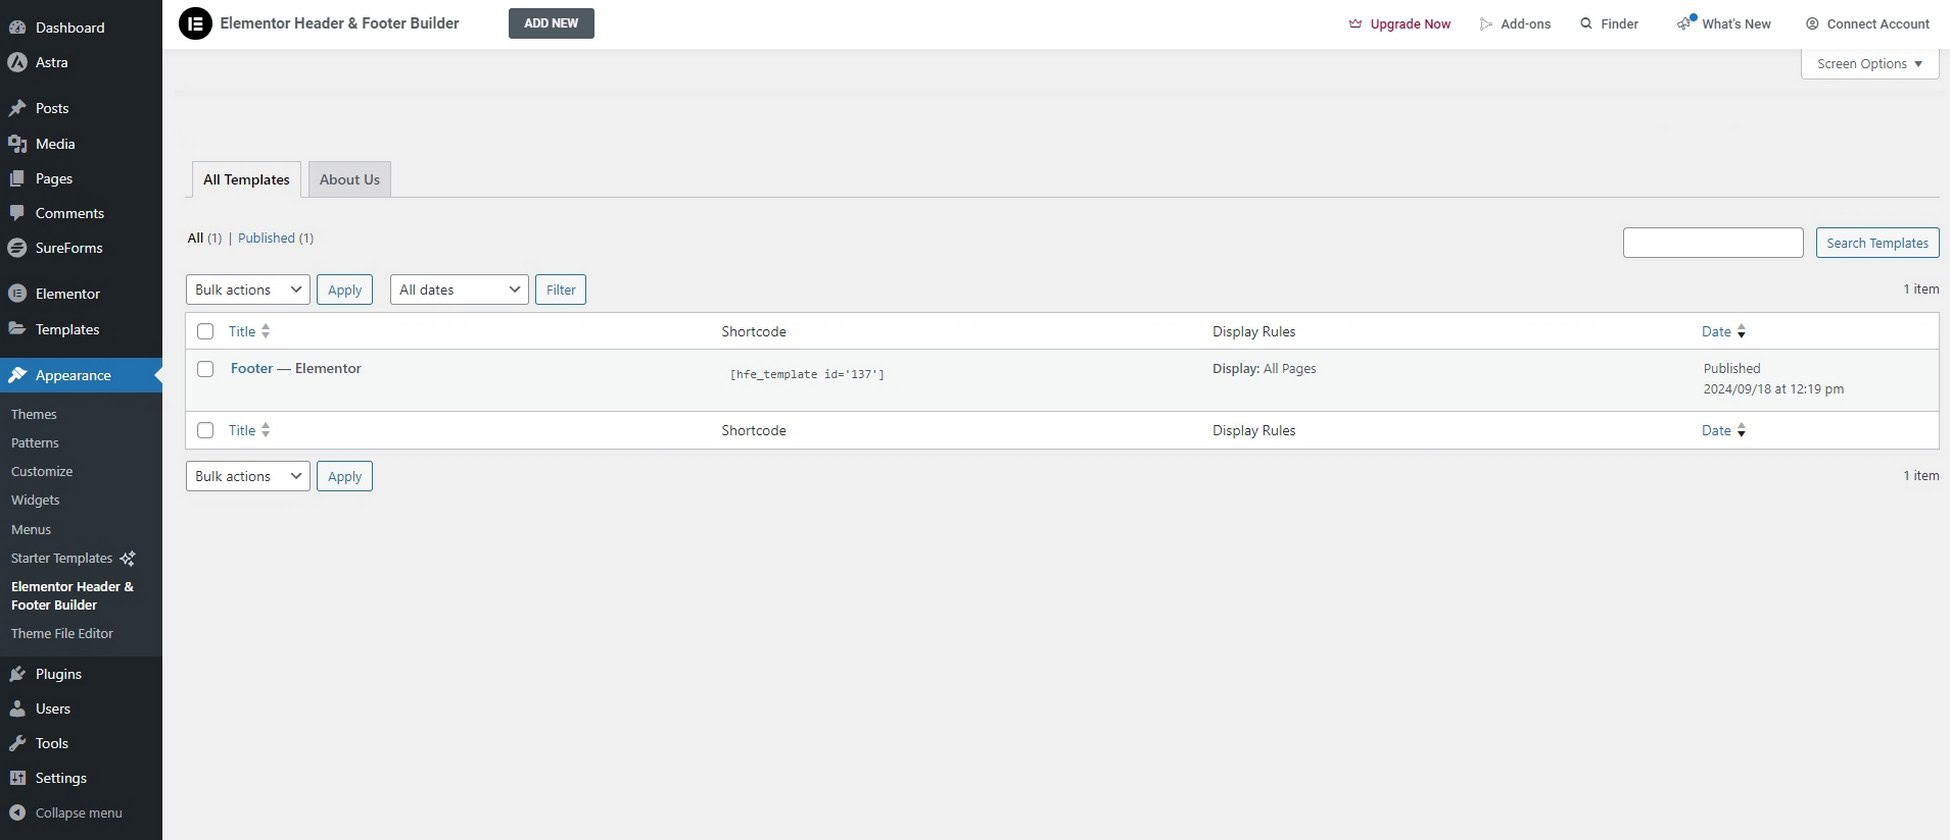
Select Edit with Elementor under the template name.
You’ll now be directed to the footer area within the Elementor page builder.
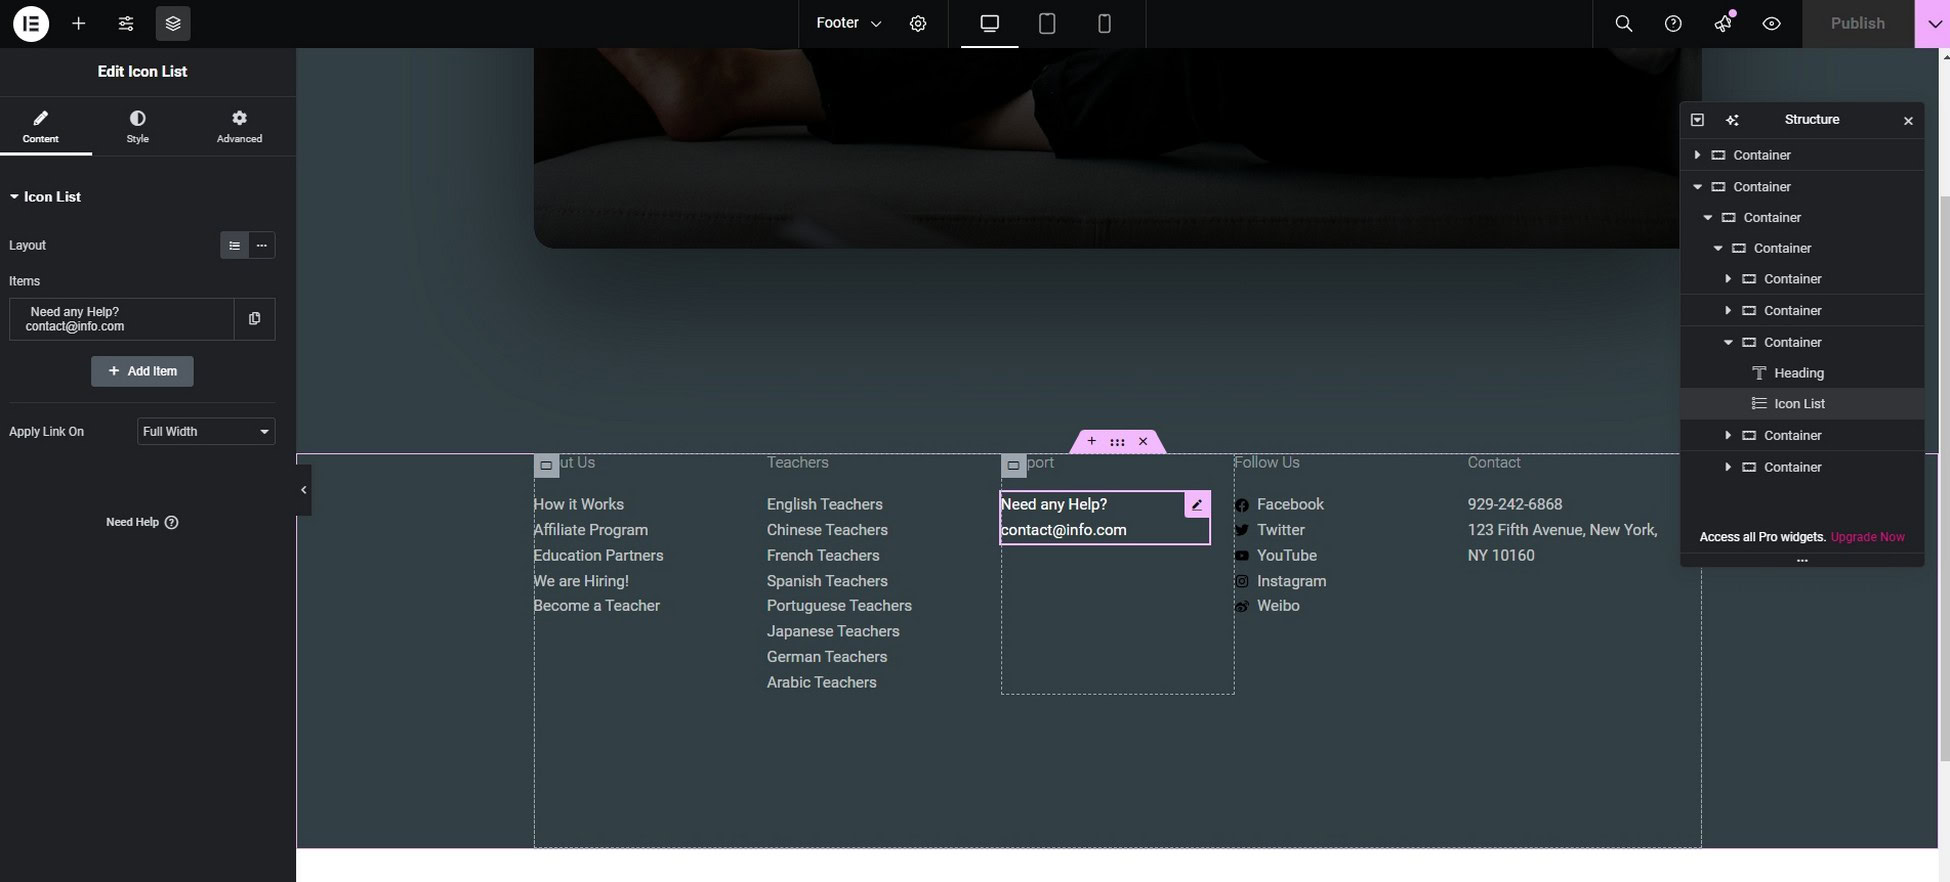
Select an area within the footer and make changes on the left as you would with any Elementor widget.
Select Update at the bottom of the page when you’re done. Your changes will now be live across your website.
You can edit the WordPress header with Elementor using in exactly the same way.
You can also add custom code, socials or whatever else you like.
Method 4: Edit a Block Theme Footer
WordPress block themes like Spectra One work a little differently.
You can still customize your footer but it’s done via the site editor rather than the Customize menu.
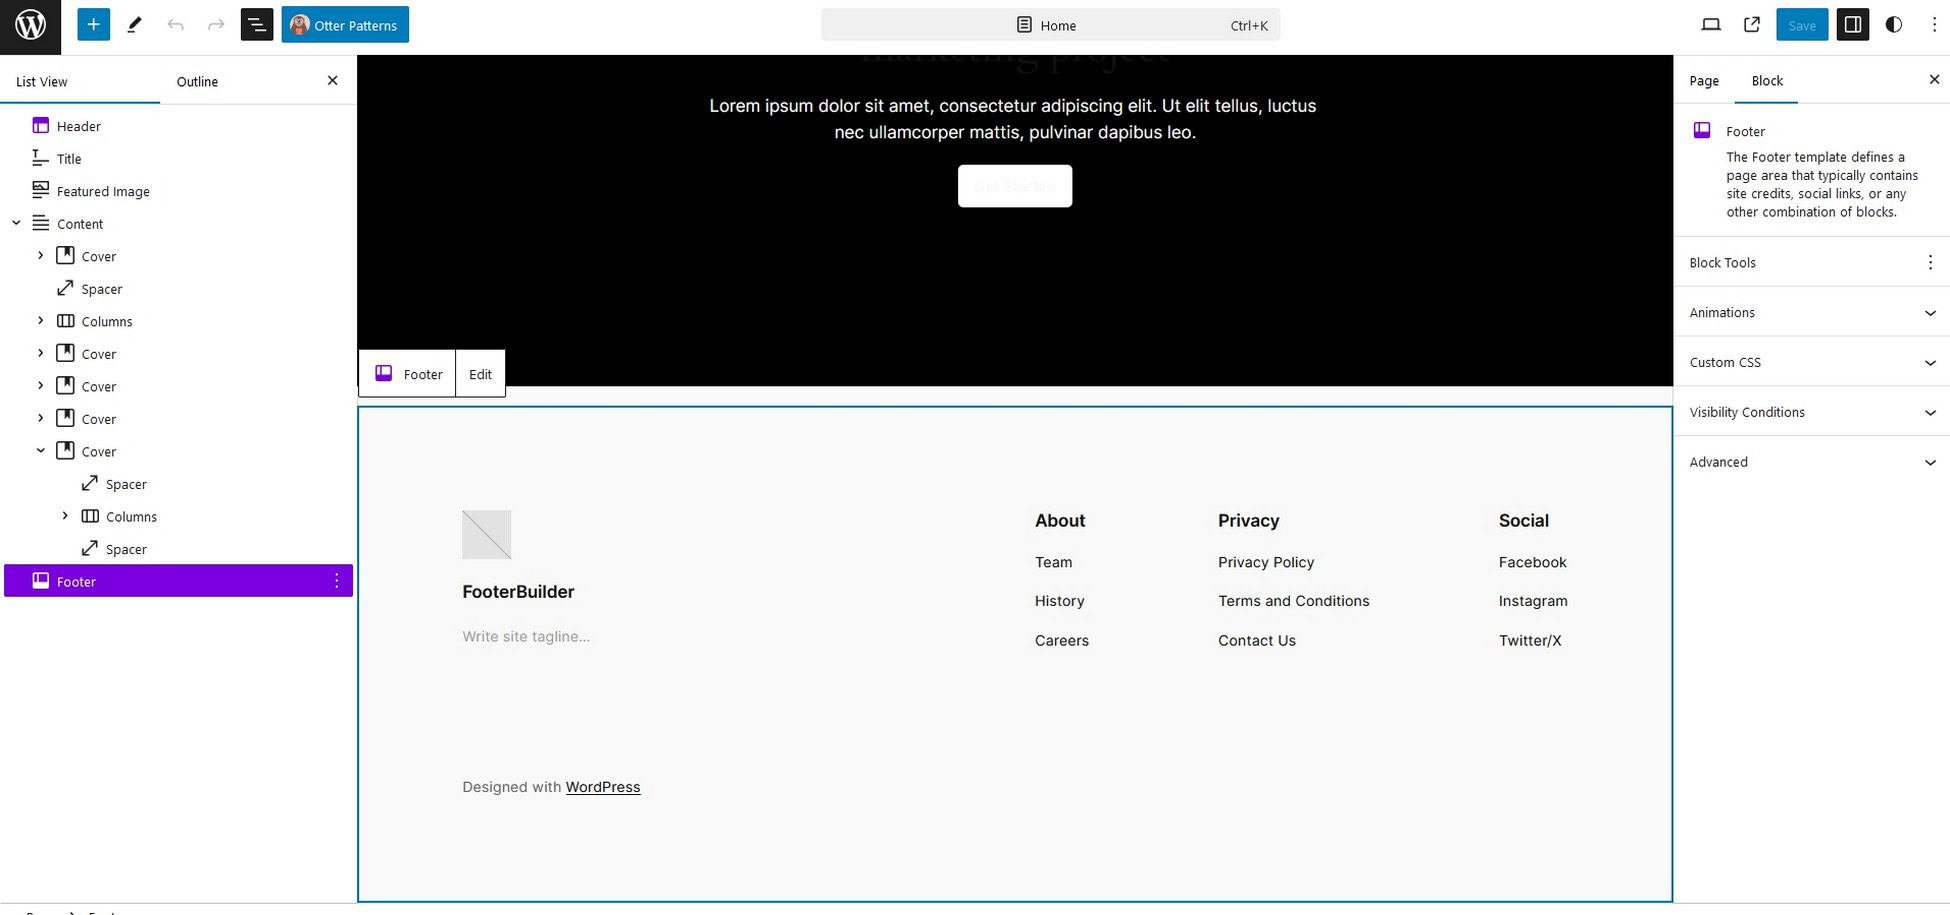
Select Appearance > Editor to begin.
Scroll down to the footer and click anywhere in the center pane.
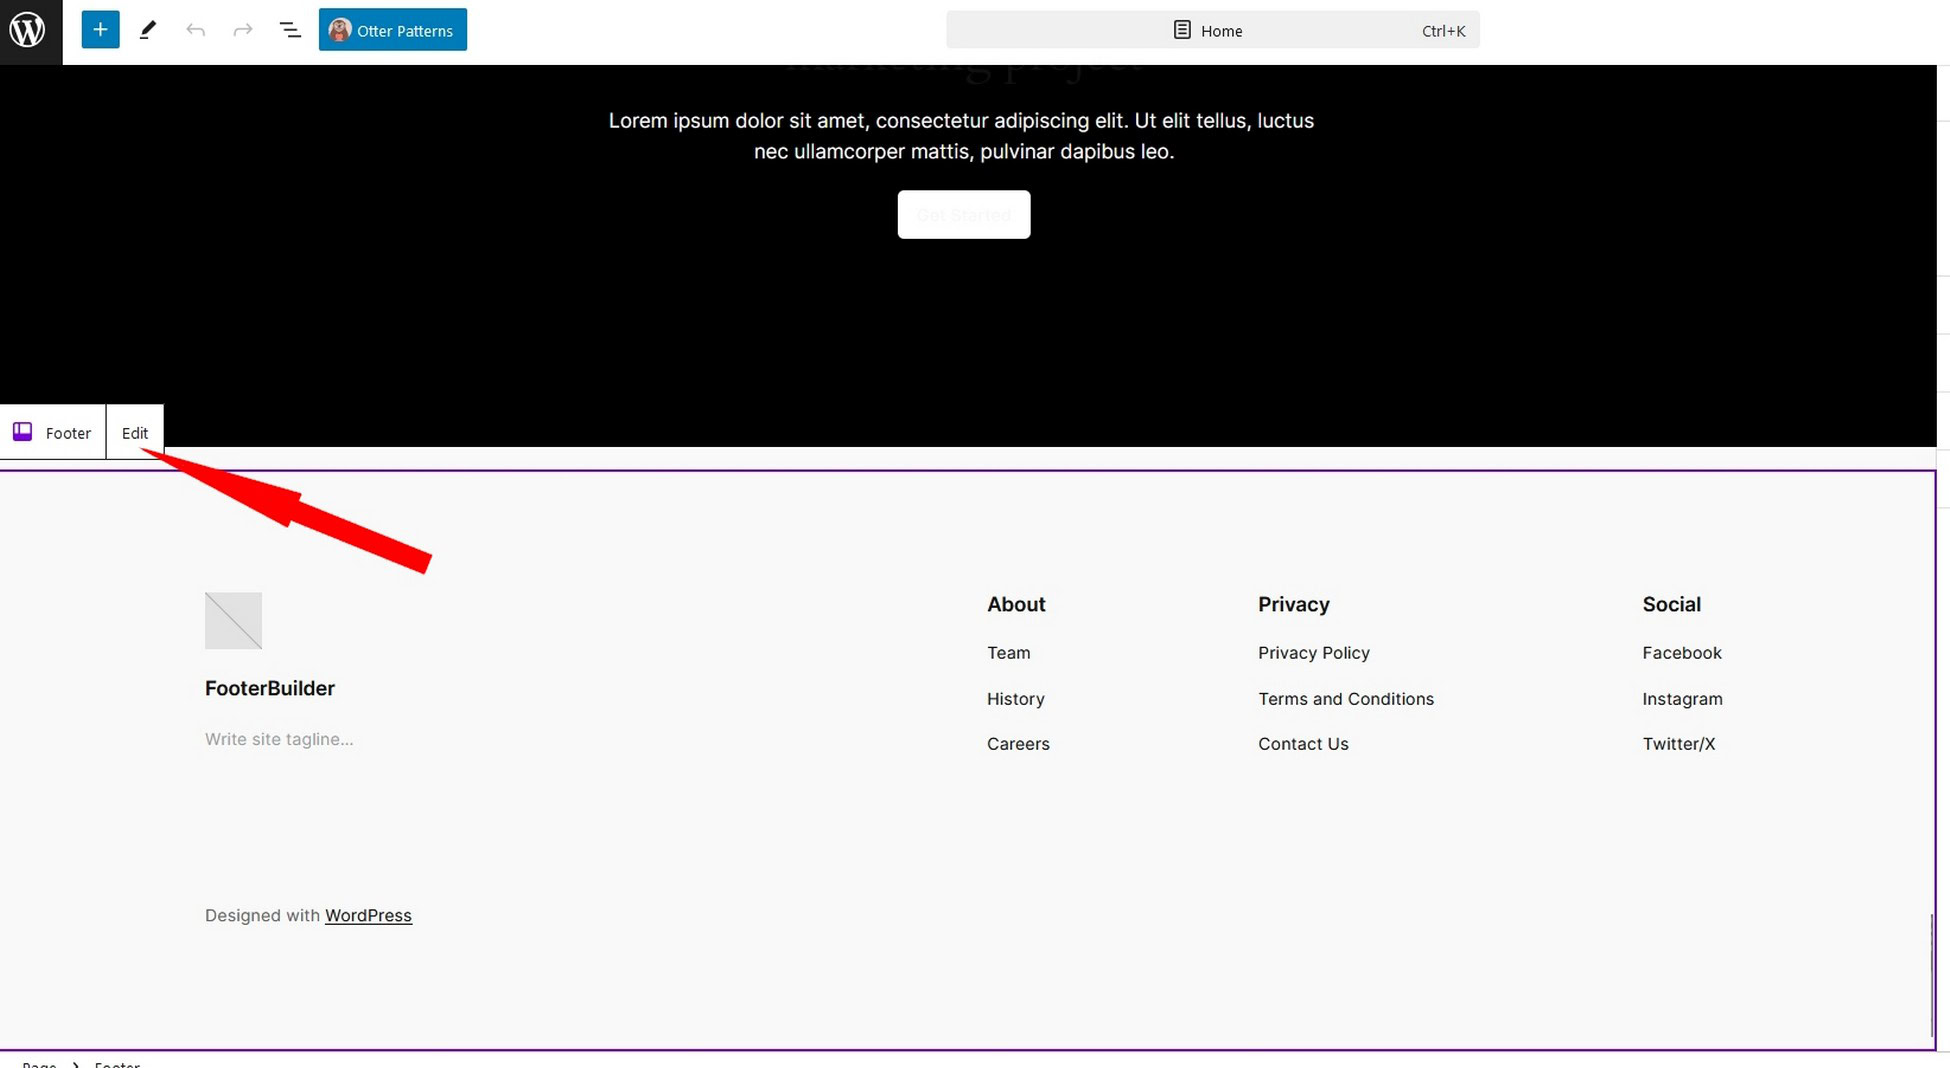
Select Edit in the little popup window to bring up the footer editor.
Select a widget or anything in your footer and use the dialog menu and settings menu on the right to make your changes.
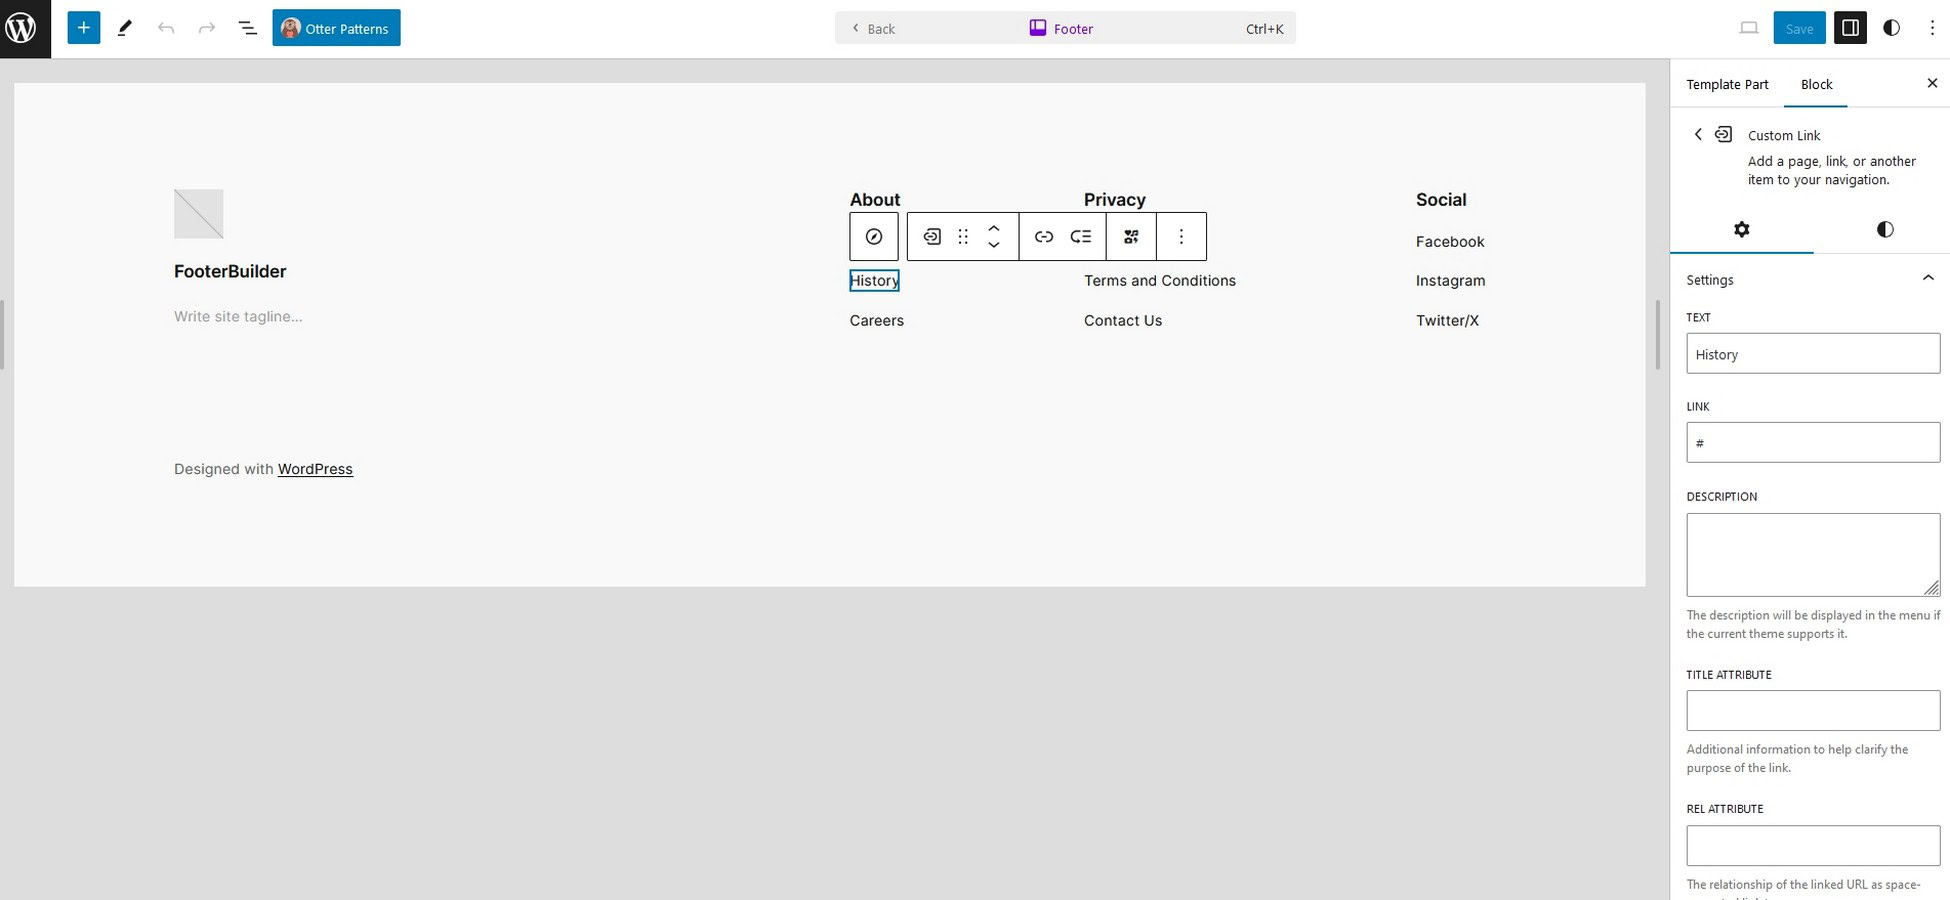
Select the blue Save button once you’re done!
Method 5: Edit the footer.php File
We recommend using the previous methods to edit the footer in WordPress as they are quick and easy.
If you would prefer to code rather than drag and drop, you can make changes directly to the footer.php file.
This file controls the look and feel of your website and will overwrite the theme settings.
We recommend creating a child theme before you make any changes to core files.
A child theme prevents any file changes being overwritten.
You don’t want to spend ages tweaking your footer.php only for all your hard work to be overwritten when WordPress or your theme updates!
Next, head over to Appearance > Theme Editor.
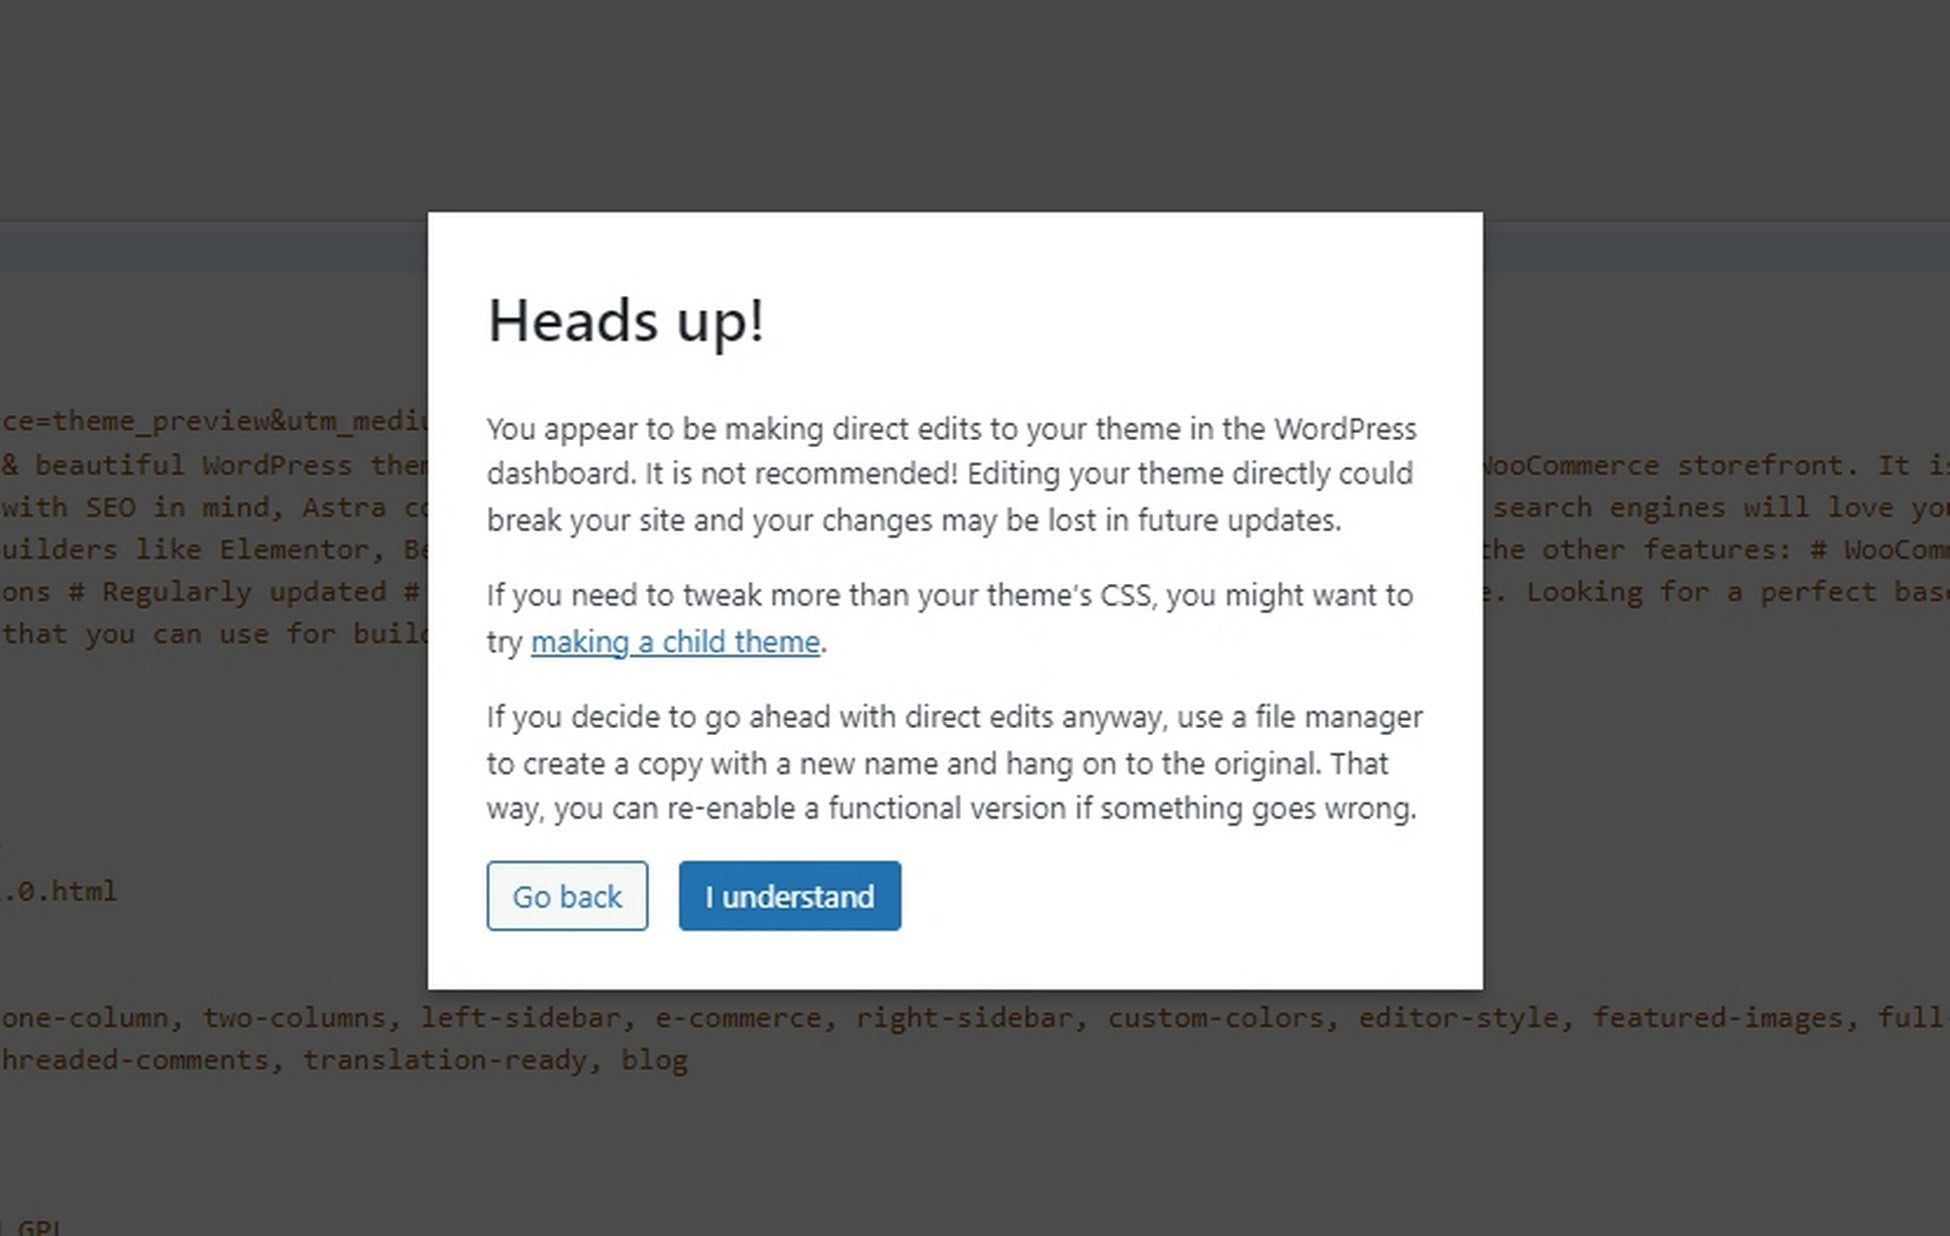
Select the blue I Understand button to access the files.
Select your active theme at the top right where it says Select theme to edit.
If you created a child theme, make sure it’s selected as the theme to edit.
Then select the footer.php file from the list on the right.
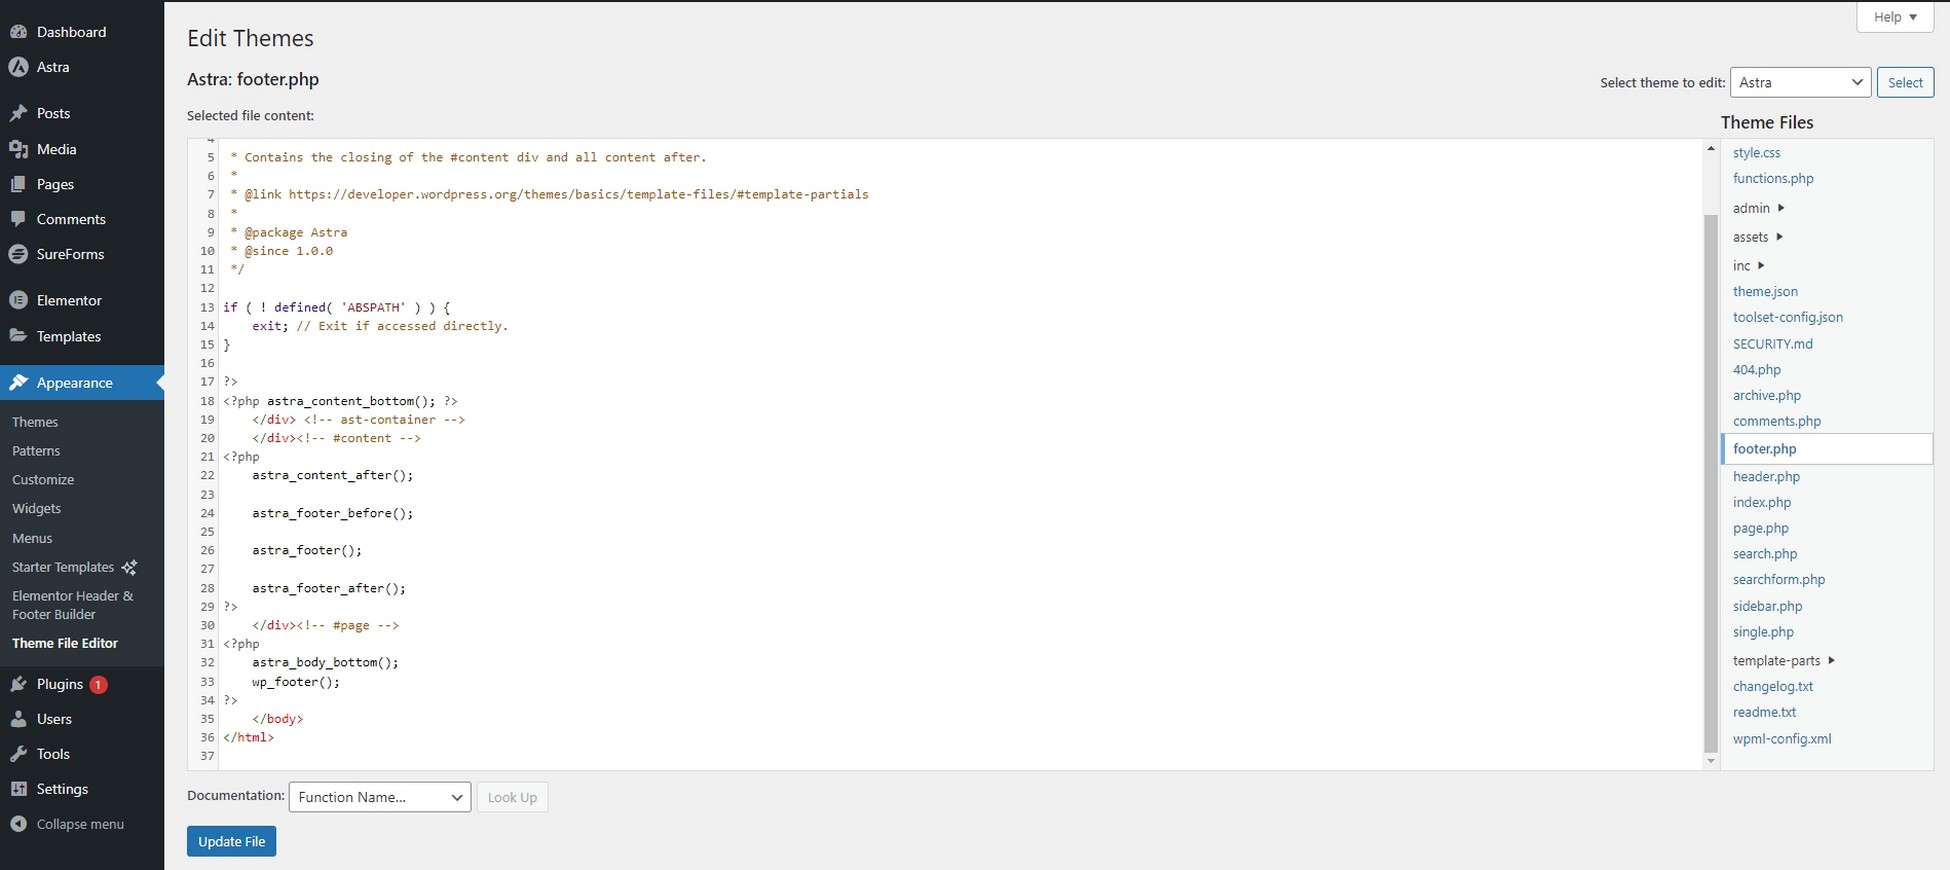
The contents of the file will appear in the center pane where you can make your changes.
Before you touch anything, take a copy of the default fault and paste it somewhere safe.
That way, if anything goes wrong, you can return it to default before trying again.
Edit the file as required and select the blue Update File button once you’re done.
Visit your site to check the footer and make sure everything works as desired.
That’s it!
Add Copyright © and Current Year to the WordPress Footer
One question we see a lot in forums and in blog comments is how to add the copyright and the current year to a footer.
Some themes come with it as default but not all do.
If your theme doesn’t include it, just add the following code to the copyright part of the footer or in a text widget.
Copyright © [year] Company Name. All rights reserved.Just change the company name to your own and leave the rest as it is.
Once added, the date should change automatically every year.
While you’re there, if you want to remove the ‘Powered by WordPress’ or ‘Powered by ThemeName’ from the footer, delete the following code:
| Powered by [theme_author]Save the change and the message will have disappeared.
Easy!
Final Thoughts
While the footer is often the last thing visitors notice, it’s an important element of any WordPress website.
Now you know some simple ways to edit the footer, you have no excuse not to make yours work harder.
The more unique and engaging you make it, the harder it will work!
If you use Astra, the Footer Builder makes life easy. Most premium Astra themes come with attractive footers all ready to go so you may not even need to change it.
Buy the Astra Essential Toolkit to access our awesome premium themes and building tools!
Otherwise the WordPress customizer and Elementor both get the job done.
While it’s possible to edit the footer.php file, that’s a method of last resort as far as we’re concerned.
Do you have a unique or particularly interesting website footer? Care to share? Let us know in the comments below!
Editing the Footer FAQs
We hope we have answered most of your questions already, but just in case…
1. Does a Website Require a Footer?
A website doesn’t require a footer but it benefits from using one. Typically your footer houses the copyright statement, social media icons, menu links, address and perhaps a map.
Ideally, you don’t want to overcrowd your main navigation with your Privacy policy, Disclaimers, and FTC disclosures. While they are important, they are better off in the footer menu.
2. Is It Legal to Remove “Powered By WordPress”?
Yes, it is legal to remove “Powered by WordPress” footer credit links. WordPress is free and open source. The GPL license allows you to freely modify it and permission is explicitly granted to change WordPress however you wish.
4. How Do I Add Social Media Icons to the Footer?
It’s very easy to add social media icons to the footer. Many themes will have a social media widget already in the footer. Elementor has one and the WordPress block editor has one too.
Add the widget using one of the methods above, add your links and test them. It’s very easy to do!
5. How Do I Add a Contact Form to the Footer?
It’s very straightforward to add a contact form to the footer. Some of our Starter Templates already have a form in or by the footer. If you want to do it yourself, add a form widget from your form plugin or page builder and link it to a form.
6. How Do I Add a Google Map to the WordPress Footer?
You can add a Google Map to the WordPress footer with ease. Instead of using the image widget, embed the map code in a text widget or dedicated map widget if there is one.
Otherwise, install a plugin, such as Maps Widget for Google Maps, and add the widget to your footer. Easy!

Pratik Chaskar holds the pivotal role of CTO at Brainstorm Force, serving as the backbone of the company. Renowned for his organizational skills, strategic thinking, problem-solving attitude, and expertise in leading and executing plans, Pratik plays a crucial role in the BSF’s technological landscape.
Disclosure: This blog may contain affiliate links. If you make a purchase through one of these links, we may receive a small commission. Read disclosure. Rest assured that we only recommend products that we have personally used and believe will add value to our readers. Thanks for your support!






Amazing guide on how to edit WordPress theme footer. The way we can customize WordPress is amazing.
Absolutely an excellent article! Very well explained and a big help to beginner.
Definitely a must-know article! Kudos to the writers and creators!
Amazing! I just found what I need. thanks for creating this tutorial.
More Power!
Awesome article. Thanks for including screenshots and examples.
You’re most welcome, Georgette! 🙂
Finally some helpful info. Been wondering how to edit footer on my site.
Just what I needed.
Cheers to that, Junko! 🙂
Great, After spending one hour to remove footer links, I finally figured out that my theme don’t allow to edit footer.
That’s awesome, Jeanine! 🙂
Very easy to follow tutorial, and the ideas about what we can do with footer are nice.
Thanks
You’re most welcome, Fernando! 🙂
Thank you for this tutorial.
With this guide editing footer become so easy.
Hello Denver,
Glad to hear that the article helped! 🙂
Good information about how we can use WordPress footer. Sometimes we forget that Footer is one of the important part of any website.
Hey,
I have followed all the steps that you have indicated above for changing the footer in wordpress but the changes am making are not being updated. What could be the problem.
I am using the free Astra Theme.
Hello Jane,
That’s strange! Probably, it could be a cache that is not letting the changes to reflect. Do try clearing the cache and site cache to see if it helps.
Or do reach out to us through our Support Portal if the issue persists. 🙂
Hi Astra team!
I have seen that your footer builder is not working properly since a while… I have recently installed your theme (I love it) in a couple of projects but I’m not able to change the number of colums in each row, modify background color, border size… all those menus don’t work
I have your latest version, 3.9.1, so think that this is a bug that you are carrying from a couple of months.
Please let me know if you are aware of this issue.
Thanks for your work!
How to make a footer multilingual?
thank you for sharing good information
Thank you for your information. It is very useful
You have a great way with words as shown in your article. You’re even good with informational content like you have here. I like your views and your writing technique. Keep up the good work!